
After Alear and their party liberate Firene, they travel northwest to the kingdom of Brodia. They must cross the Grand Crossing, a large bridge that connects the chasm leading to Brodia. Unfortunately, Elusian soldiers have taken over the bridge, and you’ll have to fight your way through. We’ll show you how to complete Chapter 7: Dark Emblem in our Fire Emblem Engage walkthrough guide.
Fire Emblem Engage Chapter 7: Dark Emblem Walkthrough
Alear and the party must fight across the Grand Crossing. Alear starts on the west side of the bridge, and Hortensia is waiting on the east side. She must be defeated to complete the chapter.
Though the map is fairly straightforward, there are Palisades and Collapsed Floors that act as obstacles, and only Fliers can traverse over them. You can use these obstacles as choke points, so keep them in mind.

Related | Is Fire Emblem Engage Ending Bad? – Ending Explained
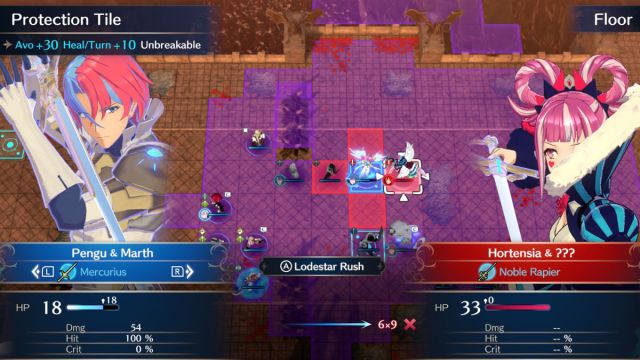
The first thing you’ll notice are the glowing blue tiles—these are Protection Tiles, and grounded units gain Avo+30 and heal 10 HP at the beginning of the turn while stationed on them.
Advance forward and position important units on these tiles. You can keep your army positioned around here, as the first set of enemies will be in range of your units.
This chapter introduces smash weapons, which function a little differently from your standard weapons. Lapis comes equipped with an Iron Blade, which is considered a smash weapon.
- Smash weapons knock units back one space after combat. Knocking units into other units or obstacles breaks them, and this is actually the only way to break Armored units.
- A smash weapon user cannot follow up attacks, and enemies will act first, even when the user initiates combat.
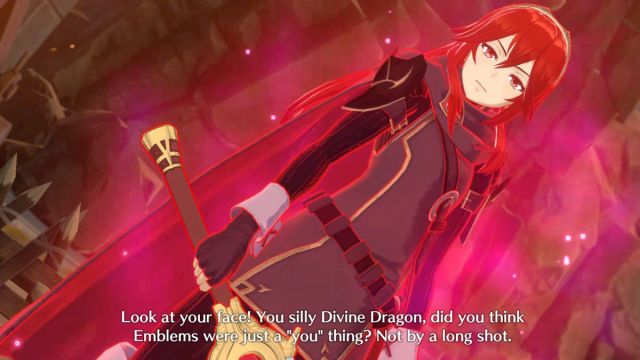
After you take your first turn, Hortensia will reveal a disturbing secret: Sombron has corrupted their Emblem Rings, enabling enemies to use Dark Sync, which is another form of engaging.
When an enemy is ready to use their engage attack, their Emblem icon will flash just like yours. Be careful of enemies that are ready to engage, as they will use powerful attacks!
Work your way towards the middle of the bridge, and be careful of the Fliers on the north and south ends. Watch out for the two Axe Cavaliers in the middle, as one of them has an Iron Greataxe, which is a smash weapon—watch your lance users.
Breakthrough the middle section, and you’ll reach Hortensia, Rosado, Goldmary, and two Sword Fliers. You’ll be able to recruit Rosado and Goldmary later, so don’t try to talk to them this time, just take them out.
Rosado is wielding a Steel Axe, so watch your sword users, as it’ll hurt them big time. Goldmary is using just a Steel Sword, so bring in a lance to take her down.
Once you get close enough, Hortensia will move in with her entire entourage, so be prepared. She’ll unleash her engage attack All for One, which brings in allied units within two spaces of her to help overwhelm the target. Her weapon, Noble Rapier, is effective against Cavalry and Armored units, so be careful.
There are two more Protection tiles right in front of Hortensia’s group, so you’ll want to plant strong units on them to draw their attention. The point of this is to try to split up Hortensia’s group, as if she uses All for One with her entire team, your units are in trouble.
We engaged Alear with Marth, and then moved them onto the top Protection Tile. This drew the attacks of both Rosado and Hortensia. Hortensia’s All for One wasn’t too bad, but Rosado’s Steel Axe hurt a bit, though the Protection Tile softened the blow.
Take out the smaller units first, including Rosado and Hortensia. Once you’ve got Hortensia all by herself, rain arrows on her with your Archers, and she’ll go down in no time.
Related | How Growth Rates Work in Fire Emblem Engage
Take down Hortensia, and you’ll earn a Master Seal for your troubles. Master Seals can be used to advance a character’s class once they’re level 10.
And that’s it—you’ve completed Chapter 7: Dark Emblem of Fire Emblem Engage. We hope our Fire Emblem Engage walkthrough guide helped you out, and if you have any other tips or questions, let us know in the comments below!


Published: Feb 2, 2023 06:31 am