Terraria is an open world adventure where players get to explore, craft, build, and fight their way to glory! There are many deadly enemies that inhabit the world of Terraria, so you’ll need to protect yourself accordingly. With lots of armor sets to choose from, knowing which armor to use and when can be a daunting task, so let us help you with our Terraria armor progression guide!
Starting Armor Progression
You’ve just started a fresh new world in Terraria, so now let’s get you armored up. The first armor set you should look towards making is your starting ore set, which will either be Copper Ore or Tin Ore, depending on your world.
Alternatively, you could just make Wood Armor, but since your starting ore will be extremely easy to find, we usually just go straight to the ore armor. You’ll need roughly 48 Copper/Tin Ore to make the head, chest, and leg piece. The set bonus gives you 2 more defense, so the Copper armor set is worth 6 defense, and the Tin armor set is worth 7 defense.
Next up, you’ll want to move onto the higher tier ore set. The next tiers of ores include:
- Iron/Lead: 9/11 defense
- Silver/Tungsten: 13/15 defense
- Gold/Platinum: 16/20 defense
At the very least, you’ll want to get your hands on an Iron or Lead armor set, as this will bump up your defense rating to the double digits. You’re going to start fighting the first couple of bosses around this point in the game, so you’ll want at least 10 defense.
Related | How to Get Wings in Terraria
From here, you now have a multitude of options until you hit Hardmode. You can get by with the Platinum set, or if you want to boost your combat prowess, you can opt for the class-specific sets. We won’t go into too many details here, since you’ll be replacing these armor sets pretty quickly. You’ll need to explore the world to craft these sets, which include:
- Fossil Armor (13 defense): Crafted from Desert materials. Increases ranged damage.
- Bee Armor (13 defense): Crafted from Bee Hive materials. Increases minion damage and capacity.
- Meteor Armor (16 defense): Crafted from the crashed meteors. Increases magic damage, and makes the Space Gun cost no mana.
- Jungle Armor (17 defense): Crafted from Jungle materials. Increases magic damage.
- Necro Armor (19 defense): Crafted from bones and cobweb. Increases ranged damage.
- Shadow/Crimson Armor (19 defense): Crafted from Eater of World/Brain of Cthluhu materials and Demonite/Crimtane Ore. Increases melee attack speed and overall damage.
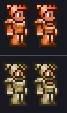
- Molten Armor (25 defense): Crafted from Hellstone Ore found in the Underworld. Strongest armor set before Hardmode.

You can choose to go with a class-specific set to increase your DPS (damage per second), or you can safely go with the Molten armor which has the highest amount of defense out of all the pre-Hardmode sets. With your armor ready, you can now take on the Wall of Flesh.
As a side note, if the Tavernkeep NPC moved into your town, you may have noticed he sells full armor sets. These sets are based off of the characters from Dungeon Defenders, another indie game. They’re decent sets, but they really only should be used during the Old One’s Army event, and as such, we won’t be mentioning them from here on out.
Hardmode Armor Progression
Upon Wall of Flesh’s defeat, your world will enter Hardmode. New biomes, enemies, and ores will appear all over your world, and you’ll need to gear up for the strongest challenges you’ve yet to face!
Your first objective should be to find the new ores that have spawned in your world. Just like before, there are three new tiers of ores, and the one you get depends on your world generation. To start out, look for either the blue Cobalt Ore, or the orange Palladium Ore. These ores will make your first Hardmode armor set.
Do note that most Hardmode armor sets have multiple kinds of headgear that grant different class bonuses. For example, the Cobalt set has the Cobalt Hat, Mask, and Helmet, which boosts magic, ranged, and melee damage respectively. Make sure that you craft the headpiece that fits your play style!
Once you make either the Cobalt or Palladium set, there are additional ore sets after that increase in defense and stat boosts. They are as follows:
- Mythril/Orichalcum: 24-42 defense, depending on which helmet you make.
- Adamantite/Titanium: 30-50 defense, depending on which helmet you make.
As you work your way through the underground tunnels, make sure to grab all the new ore you can find. The ore armor sets are always good to default to as you work your way towards the better sets.
From here, you’re about midway through the game, and your armor options are about to expand drastically. There are a few armor sets that we’re going to leave out since they require farming rare enemies and/or materials, and opt for the better and easier to get sets.
With the new ore armor, you’ll be ready to take on the first couple of mechanical bosses that are new to Hardmode. These new bosses will drop Hallowed Bars, which makes the Hallowed armor set (27-50 defense). If you don’t have the better ore armor yet, the Hallowed set is good to use in place of it.
Once you’re equipped with Hallowed or Adamantite/Titanium armor, challenge and defeat all three mechanical bosses: The Twins, The Destroyer, and Skeletron Prime. Afterward, dive into the Jungle to find Chlorophyte Ore, a new kind of Hardmode ore that appears only after all three mechanical bosses have been defeated.
The Chlorophyte armor set (38-51 defense) will be your default armor until you get one of the class-specific sets. Once you have the whole Chlorophyte set, you can start working towards your armor to fight the Moon Lord—the final boss—with.
Related | Terraria: 5 Easiest Bosses to Beat
Melee Characters
Melee characters should focus on obtaining the Turtle armor. You’ll need Chlorophyte bars and three Turtle Shells, dropped by the Giant Tortoises in the Jungle. This set makes you sturdier, and also enemies are more likely to target you, which is helpful for protecting your squishier friends in multiplayer.

The Turtle armor set will eventually upgrade into the Beetle armor set, using the Beetle Husks dropped by the Golem in the Jungle Temple. There are two different chest pieces you can make: the Beetle Shell and Beetle Scale Mail. The Shell makes you a lot tankier thanks to its passive damage mitigation, while the Scale Mail makes you deal more melee damage.
Ranged Characters
Ranged characters will want to work towards the Shroomite armor. You’ll need the Truffle NPC to move in, which requires you to grow your own Glowing Mushroom biome on the surface and build a house inside. Purchase the Autohammer from the Truffle, and then use it to create Shroomite bars by combining Chlorophyte bars and Glowing Mushrooms.

With the Shroomite armor equipped, standing still will put you in stealth mode, making enemies less likely to target you. Your weapon damage, critical strike chance, and knockback will gradually increase the longer you stay in stealth mode, effectively turning you into a stationary turret!
Magic Characters
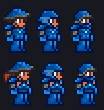
Magic characters want to aim for the Spectre armor, obtained from Ectoplasm dropped by the spirits in the Dungeon. Combine the Ectoplasm with Chlorophyte bars to get Spectre bars. This set increases your magic damage significantly, and there are two helmets to choose from.

The Spectre set will summon orbs whenever you deal damage with a magic weapon. The orbs behave differently depending on the headpiece you have. The Spectre Hood orbs will heal nearby allies, including yourself, but you deal less damage. The Spectre Mask increases your maximum mana, and the orbs will hone in on enemies and attack them.
Summoner Characters
Summoners who prefer to let their minions do the work should opt for the Spooky armor set. You’ll need the aptly named Spooky Wood in order to craft this set, which is obtained from enemies that only spawn during the Pumpkin Moon event.

The Spooky set increases max minions to four, while boosting their damage by 58%. You also move a little faster too.
Once you’ve obtained one of the four class sets, it’s time to take on the Moon Lord. He is quite the challenge, so even with your powerful armor sets, it’s going to be a tough fight!
Related | How to Change the Color of Summons in Terraria
Moon Lord Armor
You’ll be able to craft the best armor in the entire game if you manage to take down the Moon Lord! The Moon Lord drops Luminite Ore every time he’s defeated, which is required to craft one of the four ultimate sets.
During the Lunar Events, the four pillars will drop a specific fragment exclusive to that pillar, and they each represent the four classes of Terraria.

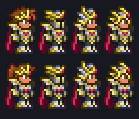
The Solar Flare armor set is crafted with the Solar Fragments. This set drastically boosts your melee potential, increasing melee damage, speed, and critical chance. This armor set also generates solar shields over time that protect you from enemies. You can also consume the shields to dash forward, slamming into anything in your way.
The Vortex armor set is crafted with the Vortex Fragments. The Vortex set dramatically boosts your ranged potential, increasing ranged damage, critical chance, and a 25% chance to not consume ammo. Double-tapping your down movement key will activate the stealth mode previously seen on the Shroomite set, increasing ranged damage at the cost of slowing you down.
The Nebula armor set is crafted with the Nebula Fragments. The Nebula set greatly boosts your magic potential, increasing magic damage, critical chance, and maximum mana. The Nebula armor has a unique function in that it spawns mini power-ups whenever you damage enemies with magic weapons. You and your allies can grab them to receive powerful buffs!
The Stardust armor set is crafted with the Stardust Fragments. The Stardust set is the go-to set for summoners, as you’ll be able to summon up to five very powerful minions. You can also double-tap your down movement key to summon a Stardust Guardian, which follows you around and fights enemies.
There you have it—a full armor progression guide from early game to end game, including the post-Moon Lord sets! If you have any other questions or tips, let us know in the comments below!


Published: Sep 14, 2021 03:24 am