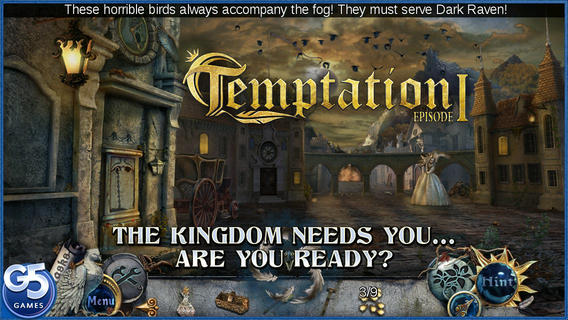
Here we continue the walkthrough for Temptation, the hidden object game where you must uncover the mystery of Dark Raven and the terrible cursed fog. At the end of part one of the guide we had successfully escaped the town and the fog, only to find ourselves in Dark Raven’s fantasy realm. Read on to discover how to break free of his clutches and bring an end to his nefarious plans.
This part of the walkthrough has been divided into 5 scenes and ends just before you enter the house. As in part one, these will be numbered in the order they can be accessed. The final section of the game will be covered in part 3.
Scene 1:
Collect the bucket from the ground and the gold leaf from tree (1 of 2). There are several puzzles here which cannot be completed yet, including accessing the locked greenhouse, releasing the golden unicorn and the peacock, investigating the burrow and the trees with the apples and the golden nugget. Instead, move north to scene 2.
Scene 2:
Collect the saw from the path and the slides from the horse under plants. Enter the well. Underneath it you will find a golden nugget (1 of 3), then tap on the well itself to talk to a trapped girl. Place the bucket at the end of the rope and collect the stained glass fragment. There are puzzles here involving the bow and arrows and (in the main scene) the golden flowers and the griffin in cage. Move north to scene 3.
Scene 3:
Collect the gold leaf (2 of 2) from the rabbit on the tree stump on the right. Now you have both leaves, they form the greenhouse key. Enter the house to collect the statue piece lying at the base of the doors. You can’t get in the house yet so go back outside and examine the rock on the left for some good news. The entrance to the right of the steps is locked for now so instead move back to scene 1.
Scene 1:
Use the greenhouse key and enter. Collect the wooden pin from the floor. You can’t do anything with the plants yet so exit and move to scene 4, accessed by going west from scene 3.
Scene 4:
Collect the tubes (1 of 2) from the right then use the saw on the wood and move the branches to reveal a golden nugget in a trap. Examine the trap and use the wooden pin. Collect the golden nugget (2 of 3) to trigger another scene with a raven then move north to scene 5.
Scene 5:
Examine the jetty on left. Collect the ribbon from the basket. Place the statue piece on the bridge to make it rise up then examine the lake-house. Place the stained glass piece to access a puzzle. All you have to do here is place the pieces into their correct place then enter the house. Examine the book on the floor, read it, then collect the bowstring. Collect the tubes (2 of 2) from the left. You can place the slides into the projector but you can’t complete the puzzle yet. Instead, examine the wood on the left. Use the saw to cut some wood to make a ladder, adding more boards from the right but again, you can’t complete this right now. Go back to scene 1.
Scene 1:
Enter the greenhouse. Place the tubes and the ribbon on the water pipes to fix them. The plant on left now grows but you can’t complete the puzzle yet. Collect the Boatman from the table in the centre. Examining the plant on the right reveals some nails. Return to scene 5.
Scene 5:
You can place the nails on the ladder, but you still need a hammer to finish the job. Examine the hole in the floor at the rear-centre to access a puzzle. Place the Boatman in the slot to start it then follow the solution below. Once you have completed the puzzle, collect the duck food and exit to the jetty. Place the food in the basket to reveal the raven again. Collect the handle from the basket and return to the lake-house. Place the handle in the projector and press it to reveal some more back-story and also to gain the code to access the hidden entrance in scene 3 under the steps. Go to scene 3.
Puzzle solution: You will see a picture with several moveable parts. You must collect three birds by moving the parts and revealing them. First, tap the sun to change it to a cloud, removing the flowers and the water-lily. Tap the frog to move it from the egg.
Change the cloud back to the sun, also bringing back the flowers and the lily. Tap the lily to bring it to the frog. Tap the frog to move it to the lily. Tap the sun to change it to a cloud and lower the flowers and the frog on the lily. Tap the egg to open it and reveal the first bird.
Tap the Boatman’s gun to change it to a fishing rod then tap the reeds to reveal the second bird. Tap the water to bring up a fish which grabs the Boatman’s line. Tap the boat to move it to shore then tap the fish to move it on to the shore. Tap the dog to turn it around then tap the duck behind the grass to complete the puzzle.
Scene 3:
Tap on the entrance next to the steps. Enter the code by first placing it in on the top right corner then choosing correct symbols. Enter the griffin’s den. Collect the hammer from the left, next to the pillar, although don’t worry about the skull for now. Examine the pole on the right, brush away the cobwebs and then collect the jar. You can’t rod the fix or release the griffin yet so go to scene 5.
Scene 5:
Enter the lake-house and use the hammer on the nails then collect the ladder. Return to scene 1.
Scene 1:
Use the ladder on the tree between the peacock and the unicorn. Climb it and collect 5 golden apples. Enter the greenhouse and use the hammer twice on the grate on the floor at the back then tap it to open it. Use the jar to collect the frog then pick up the arrows. Go to scene 2.
Scene 2:
Use the arrows and the bowstring on the bow by the well and collect it. Put the golden apples in the bucket but you still need one more nugget. Go to scene 5.
Scene 5:
Use the bow on the floating fish balloons (you need to pick it up after using it the first time). Collect the hacksaw from the right balloon when it falls down but ignore the left one for now. Return to scene 3.
Scene 3:
Enter the griffin’s den and place the frog in the jar in the bowl on the left. Tap the bowl to pour it into the skull then tap the sprayer on the left to add it to the skull. Tap to collect the poison. Return to scene 1.
Scene 1:
Enter the greenhouse and add the poison to the plant on the left. Collect the fishing tackle. Use the hacksaw 3 times on the tree on the right to collect the golden heart then go to scene 2.
Scene 2:
Place the heart in the bucket by the well. Go to scene 3.
Scene 3:
Use the tackle on the rod and collect it. Go to scene 5.
Scene 5:
Enter the jetty then use the rod on the left balloon to collect final the nugget from the basket. Go to scene 2.
Scene 2:
Add the nugget to the basket then tap it to release the girl and make the raven appear again. You now find yourself in the same world, but which has now changed to a far darker and grimmer place.
Scene 2:
Collect the golden flower from the rear planter on the left. This makes things come alive so use on the flowers at the front on the left and collect the shining butterfly. Place it in the griffin cage on the right and use the hacksaw on the chain to collect the griffin. Use the flowers again to bring the golden butterflies back to life, revealing the lock hangers (1 of 4). Go to scene 1.
Scene 1:
Use the flower on the peacock to bring it back to life then tap it to collect the tail feathers. Move north to scene 3.
Scene 3:
Tap on the rabbit and use the flower of gold. Collect the rabbit and head under the stairs. Give the baby griffin to its parent. Now you can examine the chest so place the peacock feather to open it. Collect lock hanger (2 of 4) then go to scene 1.
Scene 1:
Put the rabbit back in the burrow and collect the hanger (3 of 4). Go to scene 5.
Scene 5:
Enter the lake-house. Use the flower of gold on the hanging plants on the right. Collect the hanger (4 of 4) and go to scene 3.
Scene 3:
Enter the house and use the hangers to open up a puzzle. See below for the solution. After you complete the puzzle, Dark Raven is revealed but just as swiftly disappears, allowing you to enter the house.
Puzzle solution:
Here you have to pull the various parts of the picture down and attach them to the correct hooks at the bottom of the screen. If done correctly, it will reveal a certain games company’s logo. For this solution, the hangers and hooks will be numbered 1 to 9, starting from the left. This is a tricky one so place the hangers on the following hooks:
Hanger 1 – Hook 3 Hanger 2 – Not used Hanger 3 – Hook 1 Hanger 4 – Hook 4 Hanger 5 – Hook 6
Hanger 6 – Hook 8 Hanger 7 – Hook 5 Hanger 8 – Hook 7 Hanger 9 – Not used
Time to take a break now, but we will pick up the story in part three of this walkthrough.





Published: Oct 26, 2013 07:45 am