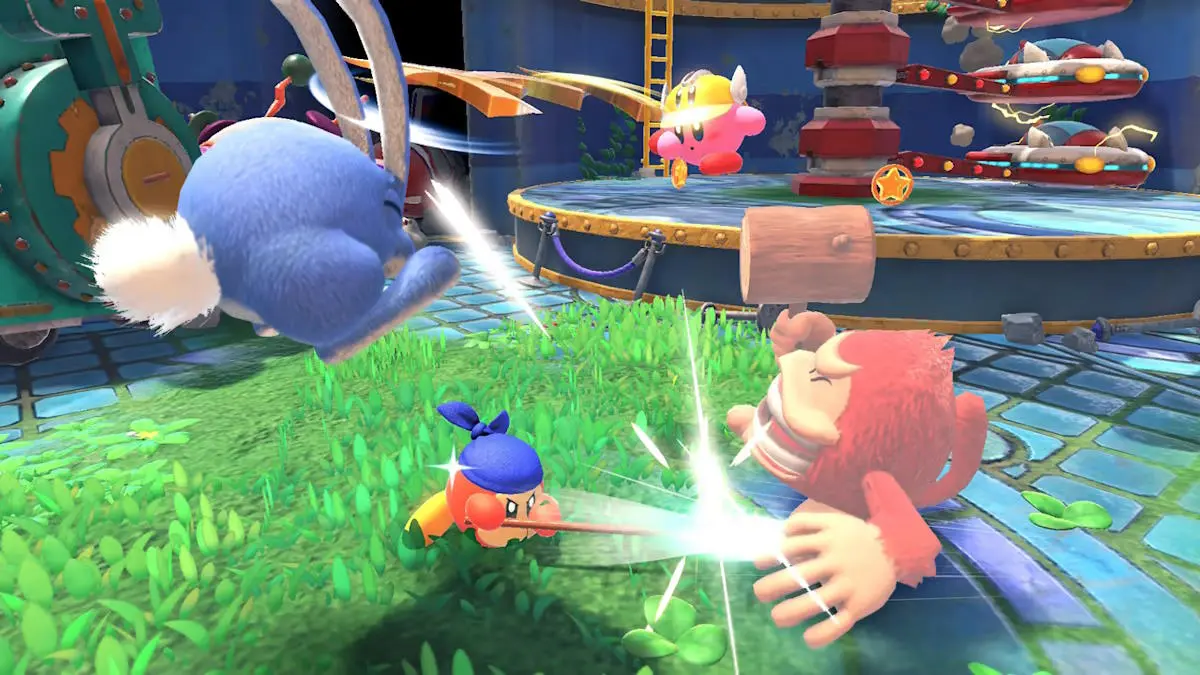
Welcome all Kirby heroes! It has been a week since Super Kirby Clash has launched, and we hope that you are having a blast with it. Members of Team Kirby can take up one of the four roles to fight against evil, each with its own unique way of contributing to the team.
In today’s guide, we will go over all four roles and discuss their strengths and weaknesses. If you already have a favorite role and want to learn more or you want to try something new, this guide is for you!
If you are looking to complete all of the heroic missions in Super Kirby Clash, you will eventually need to know how to play all of the roles. We have you covered in our Super Kirby Clash complete roles guide!
Sword Hero (Tank/Melee DPS)

Stamina: ★★★☆
Attack: ★★★☆
Recovery: ★★☆☆
General Playstyle
Brandish your sword towards the skies! Sword Hero is the starting role in Super Kirby Clash and it features all-around stats. Sword Hero’s move set allows it to stick close to enemies and deal consistent damage, and there are also a lot of mobility options when you need to get out of harm’s way.
The most important move in your arsenal is your Hero Shield. All roles can guard on their own, decreasing the amount of damage they take, but whenever a Sword Hero guards a giant bubble forms around them. All allies inside the bubble are completely invincible!
With careful use of Hero Shield, you can allow allies to keep on attacking the boss without fear of counterattack. This is particularly useful with Hammer Lords, as they will be up next to the boss with you most of the time.
Your general strategy is to use Spin Slash as much as you can, as this is the Sword Hero’s most powerful move when fully charged. Use Sky Energy Sword to attack from afar safely if you need to, and use all of the other moves to attack while repositioning yourself. Do not forget to block for your allies using Hero Shield!
Sword Hero Move List
This move list is assuming you are using Joy-Cons in the upright position, not the horizontal position. Also, if a move is bolded, that means you cannot be hurt while performing this move!
- Overhead Slash – B: A quick chop. Mash the B button to combo into…
- Multisword Attack – B rapidly: Rapid flurry of sword slashes, ending with a final powerful slice.
- Spin Slash – Hold B: Hold the B button to charge in place. You can charge up to three levels. Let go to spin slash and deal lots of damage. A great move to use if the boss is stunned or generally slow moving, but beware of collision damage!
- Twister Slash – Hold B+Up: Charge a Spin Slash like normal, but hold up before you let go of the B button. Kirby will spin slash his way up into the sky with the height of a half jump. Use this if you feel like the boss is about to get too close to you.
- Drill Stab – Dash+B: Dash forward with your sword out to pierce through enemies. Take advantage of this move’s invincibility frames to get yourself out of sticky situations!
- Sword Spin – Dash+B midair: Spin your sword in mid air like a twirling ball of death!
- Chop and Thrust – B midair: Slice your sword in mid air. If you strike an enemy, Kirby will bounce off to the side safely, and you can go in for…
- Hat Thrust – Hold Down+B midair: After Chop and Thrust, hold your sword below you. If you hit an enemy, you will bounce above them. If you continue to hold down the buttons, you can “pogo-stick” on an enemy using your sword. Does not deal too much damage, but is fun to do!
- Down Thrust – Down+B midair: Immediately drop down to the ground while slicing through anything on the way. This move lacks invincibility, so beware of using it to drop in on bosses!
- Upward Slash – Up+B: Perform a rising slash into the air. Combos into…
- Sword Dive – Down+B midair after Upward Slash: Slam into the ground, sword first. Just like Down Thrust, this move lacks invincibility frames.
- Sky Energy Sword – Hold Up, then B: Raise your sword skyward. Wait until it flashes, then press B to launch an energy wave. This is Sword Hero’s only projectile move!
Hammer Lord (Melee DPS)

Stamina: ★★★★
Attack: ★★★★
Recovery: ★☆☆☆
General Playstyle
Swing your mighty hammer to crush foes! Hammer Lords wield massive hammers that grant them access to some of the most powerful moves in all of Super Kirby Clash. However, because of how heavy those hammers are, Hammer Lords are the slowest moving Kirbies in the game, and they can barely fly to boot.
Do not be fooled by their high Stamina rating – expect to guard a lot, as your lack of mobility makes you a sitting duck! Try to stick by your ally Sword Heroes so that they can Hero Shield you while you attack freely.
Since you are main form of dealing tons of damage, stick close to the boss and try to get off as many Hammer Flips as you can. If you need to move out of harm’s way, use Hammer Swing or your default slide ability.
Hammer Lord Move List
- Hammer – B: Slam your hammer down.
- Hammer Flip – Hold Up+B: Ignite your hammer, charging up to three levels. A fully charged Hammer Flip is the STRONGEST attack in all of Super Kirby Clash! Your hammer actually deals damage as it is charging, so try positioning yourself so that the hammer is touching the boss.
- Hammer Swing – Dash+B: Spin your hammer around as you slide forward. Great for repositioning!
- Giant Swing – B midair: Spin your hammer around midair.
- Ultra-Giant Swing – Dash+B midair: Spin your hammer around midair even faster!
- Hammer Twirl – Down+B: Grind your hammer into the ground. Deals damage when enemies are right next to you.
Doctor Healmore (Healer/Melee & Ranged DPS)

Stamina: ★★☆☆
Attack: ★☆☆☆
Recovery: ★★★★
General Playstyle
Concoct elemental elixirs and revitalize the team as Doctor Healmore! This role probably has the most unique moveset, enabling it to heal the team and damage enemies from afar and up close. If you like playing supports that can dish out some damage on their own, this role is for you!
Your key ability is Healing Area, which can charge up to three levels. Charge up your vial, then let go to release a magical drop that creates a healing field upon hitting the ground. The higher you charge, the bigger and more potent the healing field will be. Use this to top teammates off and heal them in a pinch – just be sure not to drop the healing field below the boss!
Depending on how defensive your team plays, you may have to be healing all the time, so do not be afraid to stick to just healing if the situation calls for it. Keep in mind that when a Kirby is at full health, they do additional bonus damage. You will know when they are full when their health bar is glowing.
When the team is healthy, you can help DPS by using Science Lab and Jewelry Shop. Science Lab lets you unleash various chemical concoctions in melee range, which we will go over in detail in the move list. Jewelry Shop lets you blast foes from afar with a barrage of hard gems.
Doctor Healmore Move List
- Bouncing Jewel – B: Tosses a jewel out in front of you. The jewel bounces several times before dissipating, so you can use this at a safe distance away from the boss.
- Healing Area – Hold B: Charge up your vial up to three levels. Release the B button to release a water drop that creates a healing field on the ground, which lingers for a while. Higher charge means a more potent healing field.
- Science Lab – Hold Down+B: Kirby will bust out his own science kit and whip up a potion in a few seconds. During this time he is invincible, but when he finishes making the potion he is vulnerable again. Once the potion is complete, let the B button go and watch elements come to life! Science Lab’s attacks come out above you, so it is best to use them close to enemies.
- Red potions shoot out a powerful lava stream directly above you.
- Yellow potions launch three lightning balls around you.
- Blue potions creates a wave of ice above you.
- Green potions are edible! Kirby will drink them and recover some health. This acts as if you ate food, so you can heal teammates after drinking it!
- Research Vault – A/Guard: Press the A button or guard when you are holding a completed potion and Kirby will stash the potion away for later. You can move normally after this, and your potion can be activate at any time by activating Science Lab. Just be careful though, as taking damage at any point will make you lose the stashed potion.
- Spray Medicine – Hold Up+B: Spray rainbow medicine above you, dealing damage constantly.
- Bandage Spin – Dash+B midair: Spin your bandages around you, dealing rapid damage to enemies that are very close to you.
- Jewelry Shop – Dash+Hold B midair: Launch three jewels in an arc. Try to angle this attack so that all three jewels hit your target for maximum damage.
Beam Mage (Ranged DPS/Support)

Stamina: ★☆☆☆
Attack: ★★☆☆
Recovery: ★★★☆
General Playstyle
Wield the power of time magic as Beam Mage! As the Beam Mage, you will launch powerful beam magic from long and mid range. Beam Mages are able to deal consistent damage from afar, which is good because they have the lowest base Stamina of the four roles. Be careful not to take a hit, as it might really hurt!
While Beam Mages deal good damage, they are probably the most sought after role because of their timing stopping ability Time Beam. As soon as the battle starts, begin throwing out fully charged Time Beams. Once time is frozen, you can get up close and use your other attacks, or you can stay afar and keep slinging Time Beams.
When time is frozen the boss completely open to any kind of attack, enabling your team to use their strongest attacks fearlessly. The clock also stops too, saving you precious seconds. Do note that bosses become more resilient to Time Beams every time you stop time, requiring you to hit them with more Time Beams to trigger the effect again.
Due to how powerful Time Beam is, Beam Mages are a must have if you are trying to go for platinum medals or speed clear bonuses, which require you to defeat bosses under a certain time limit.
Beam Mage Move List
- Beam Whip – B: Bring down a line of beam magic in an arc.
- Time Beam – Hold B: Throw out a sphere of powerful time magic. Charges up to three levels. When a boss is hit by Time Beam, a clock will appear over them, and it will fill up according to how charged the Time Beam was. Upon filling the entire clock, time will freeze temporarily.
- Cycle Beam – Dash+B: Unleash a torrent of beam energy in front of you, dealing rapid damage.
- Beam Blast – Dash+B midair: Rain small beam pellets upon your foes at an angle.
Thus brings us to the end of our complete roles guide for Super Kirby Clash. We have more guides coming up, so stay tuned!





Published: Sep 13, 2019 04:58 am