In this third part of our Shining Force 2 walkthrough, we’ll be covering the game’s advanced features. From the point you leave Galam, all the way until you acquire Phoenix, this website will have you covered.
Recommended Videos
Let’s not waste any more time and get right to work.
Leaving Galam
- You should save your game and leave Galam. Some Galam Soldiers will try to stop you. Slade attempts Sarah’s strategy for entering the castle, but it fails.
- The fighting has started. There’s no need to stress too much over advancement in levels. Put Slade on level 9 and that’s all.
- To accomplish this, let Slade do the killing. You may still have Sarah recover, just long enough for her to learn Blast. Get rid of the bad guys before you can go on.
Baby Turtle
- When you enter Granseal, you will see that Galam’s influence has already been felt there. When you enter the home on the far east side, you will find a young turtle inside.
- If you offer to name him, Kiwi will join the Force regardless of what you call him. His health is as low as it is possible to get, but if you want to level him up, he has the potential to become useful. Proceed into the castle.
A Heated Discussion
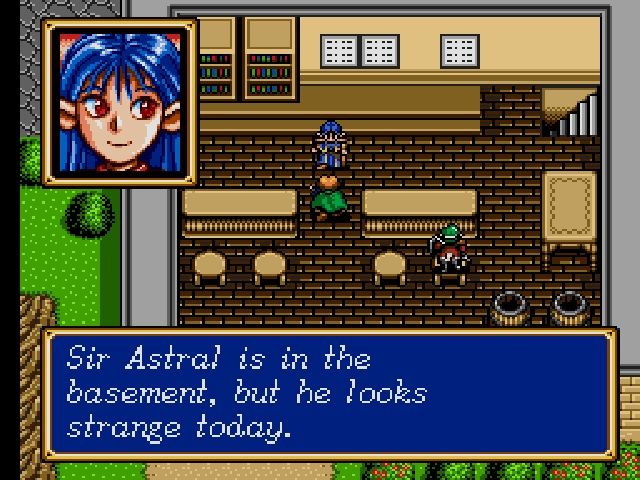
- Once you enter, you will find Astral and Lemon engaged in a heated discussion.
- Lemon is informed by Astral that Galam is under the influence of a demon. After that, Lemon and Astral hear Princess Elis screaming from a distance, and they make the decision to enter the Ancient Tower.
- If you do what they say, both the King and the Minister will eventually join you. If you go, you will find that Lemon is very close to passing away.
- Enter the building and take the stairs on the left.
Gate To The Evil World
- Elis is held as a captive when King Galam regains consciousness. He unlocks the door that leads to the World of Evil. Your hero is thrown up there by the Minister and Astral in an attempt to stop him just as he is ready to escape from captivity.
- Your protagonist is clinging to Galam by the Jewel of Evil at this point. His Jewel then bursts into flame, and the Jewel of Evil fuses to your hero’s neck, causing the two to combine into one. Galam travels to the Evil World, but he has to get his diamond first.
A Major Earthquake
- Right at that moment, there was a major earthquake. You must flee the tower as well as the castle. At the entrance, two guards instruct them to make their way to the ship. After that, they are shown falling into a gap that has appeared. Proceed to the east, but don’t forget the Mithril – that’s your one shot at getting this item, and you’ll miss it if you do.
- Proceed to the port by going via Astral’s school. After boarding the boat, examine the barrels located to the right of the entrance for a Quick Chicken before setting sail. Have a conversation with the elderly guy about leaving.
Sail To Paramecia
- You make it out of Granseal in the nick of time to avoid being sucked into the Large Chasm along with the rest of the town. They come to the conclusion that it would be best to sail to Paramecia and establish a new home there.
- They are shown crashing onto the land and then beginning to dismantle the ship in order to salvage the lumber.
- Bring the piece of board up to the deck where you are working. Exactly at that moment, someone dashes in and informs him that a friend of his from the North Cliff has not yet returned.
- After that, the captain orders your hero to ascend to the North Cliff.
To New Granseal
- A whole new bunch of creatures comes just as the man’s companion is getting about to lie down, which kicks off the combat. There is a whole new subspecies of monstrosities to be found here. They have each achieved a significant increase in their overall strength.
- It is essential to perform at your very best in this situation and level up to 11. Keep Kiwi contained inside at all times. To win the fight, you must eliminate every single monster. Once you have rescued the guy, you will be sent back to the recently constructed New Granseal.
A Year Later
- After a year has passed, Astral informs the troops that they have not received their trade. Proceed to the training room we have been using.
- Take the Warrior’s Pride that is attached to the shield at the rear. Take the Joyous Bread that’s sitting in the barrel, and then leave the Castle.
- Learn what all the fuss is about by getting up up and personal with a unique animal. The Minister has appeared in order to put a stop to this. He brings the bird back with him to the palace. Follow their lead.
Getting Phoenix
- In this particular scenario, Astral is going to initiate conversation with the bird. To make matters more clear, it is a Phoenix, and his name is Peter. The topic of Volcano sometimes comes up in their conversation.
- Peter obeys the order given to him by Astral and goes to Volcano to sign up for the Force. Peter is the most powerful member you will ever have access to, despite the fact that you have not yet learned out how to master him.
- The Minister is kind enough to give you one hundred gold. You should definitely upgrade your equipment while you’re here.
The third segment of our comprehensive walkthrough of Shining Force 2 has now come to a close. Before moving on with your quest, you need to make sure that you have read through our whole instructions.


Published: Nov 29, 2022 09:27 pm