As a new contractor for the mysterious “Company”, your job is to explore abandoned facilities and recover valuable scrap to meet your profit quota. We’ll help you be the best contractor in our Lethal Company tips and tricks strategy guide.
Lethal Company Tips & Tricks Strategy Guide
Lethal Company is all about managing your time wisely, as you’ll need you to recover enough scrap to sell to meet your weekly quotas. Finding the scrap usually isn’t a problem—it’s surviving long enough to sell said scrap that’s usually the issue. Here are some crucial tips to keep you a happy and healthy contractor.
Tip #1: Designate Someone to be the Navigator
In Lethal Company, knowing what is lurking around the corner ahead of time can be the difference between life and death. For this very reason, it’s advisable to have someone stick back and hang out in the ship to keep an eye on the monitor—a navigator, if you will.
For this strategy to work, the person who is designated as navigator needs to have a Walkie-Talkie. Naturally, the rest of the team will need Walkie-Talkies in order to communicate with each other, so you’ll need to secure some money before you can use this strategy.
With everything set up, one person with a Walkie-Talkie hangs back, and uses the monitor to keep track of everyone else who goes inside the building. The ship’s monitor is incredibly useful, as it can be used to track threats, scrap, and locked gates.

Most importantly, the navigator can see a general layout of the building when they’re observing someone on the monitor. The building layouts are randomly generated on each visit, and they can be really confusing to navigate sometimes, so it’s really helpful having eyes in the sky guide you to where you need to go.
When you’re using the ship monitor, you can press the white button to switch between players. Here’s a legend for icons:
- Blue dots: Players;
- Red dots: Monsters;
- Green triangles: Scrap;
- Letter and number codes: Turrets, gates, and mines;
On that last item, the navigator can use the terminal and punch in codes to unlock gates, and disable traps. For example, if a gate says C2 on it, the navigator has to type in C2 into the terminal, which unlocks it. Conversely, you can type in the code again to re-lock the gate.
Tip #2: Scan Frequently
Press the right-mouse button to scan the environment in front of you. Your scanner is incredibly be useful and costs nothing to use, so use it often. It can point out potential threats, locations, and scrap for you. The colors that come up on your scans correspond to different objects:
- Blue scans: Locations;
- Red scans: Hostile/passive wildlife;
- Green scans: Scrap;
The most important function of the scanner is using it to detect hostile creatures hiding within the dark rooms of the abandoned buildings. Often time you’ll find yourself without a flashlight, and that’s where the scanner comes in clutch. Even if you’re going into a room blind, spamming the scanner can alert you to potential dangers.
Tip #3: Move and Escape quickly
As soon as you touchdown with your selected moon, head to the main entrance as fast as you can. Your job is to swiftly—but carefully—navigate through the building and look for scrap. Once you find some, grab as much as you can hold, then head back to the main entrance.
Exit through the main entrance, and drop your loot there, then go back in for more. The reason you want to leave your scrap outside is because any stray scrap left inside the building is vulnerable to being stolen by Hoarding Bugs. These guys aren’t particularly dangerous, but they love shiny metal objects, so they pick up and move any scrap they can find.

As you pop your head out to drop your scrap, be sure to keep an eye on the time. You can’t see the current time when you’re inside buildings or the ship, and you definitely want to start bailing out around 5 PM, because that’s when the outdoor beasts start showing up.
Remember that your highest priority is to simply survive. If your entire team is wiped out, you lose ALL scrap, even if it’s on the ship. If you let this happen too many times, you won’t be able to reach your quota.
It can be tempting to dive back into the building because you didn’t really find too much scrap, but it’s better to prioritize your safety over more scrap, especially if you’re already have some teammates down. If you’re the last one alive, just get out as fast as you can.
If you haven’t already noticed, time is the of the utmost importance. The faster your move, the safer you’ll be while you collect scrap, which means better odds of survival.
Tip #4: Dealing with Traps and Creatures
No matter how quick you are, you’re probably going to run into some traps and creatures that want you dead. Knowing how to deal with them can help you survive you expeditions.
Outdoor Creatures and Traps
First off, let’s talk about the creatures you can encounter outside. As we mentioned, the hostile outdoor creatures only start to come out once you get closer to nighttime. The daytime creatures are mostly harmless, save for one exception: Circuit Bees.
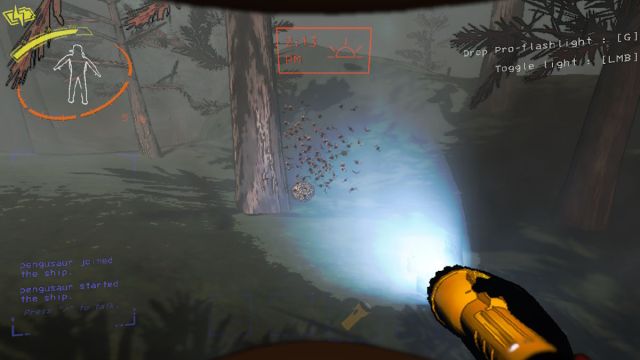
Circuit Bees look like swarms hanging around their nests on the ground. If you get too close, they’ll start chasing you with their electrified stingers. It’s best to stay clear of them, but if you’re feeling daring, you can try stealing their hives, as they’re worth a lot.
Beware of environmental traps, like water and quicksand. You cannot swim, so falling into a deep body of water is a death sentence. Some moons have patches of quicksand, denoted by their dark brown appearance. If you walk into quicksand, immediately start backpedaling to get out.
When night falls, dangerous night creatures start spawning. The most common night creature you’ll encounter are Eyeless Dogs, who, as the name states, cannot see and rely entirely on hearing to find prey.
Something important to know is that a lot of the aggressive creatures in Lethal Company rely on sound to find you. If you’re around dangerous fauna, it’s best to keep quiet. This means crouching to dampen your footsteps, and making no noise over your microphone.
There are other outdoor beasts, but just focus on staying quiet and out of sight, and go straight to the ship so you can secure your scrap.
Indoor Creatures and Traps
Inside the various facilities, things get a little crazier. There are low threat creatures like the aforementioned Hoarding Bug and the Spore Lizards that shoot blinding gas at you, and there are also much bigger threats. Here are the creatures and traps you should look out for.
You may come across sentry guns and landmines left behind in buildings. Both devices make unique mechanical noises, so listen to them. Watch the ground to avoid stepping on landmines, and quickly run past sentry guns before they can lock onto you. Both traps can also be temporarily deactivated by typing in their corresponding codes in the ship’s terminal.
The Thumper is a strange-looking creature that has very fast charging speeds. Once they detect a player, they’ll charge at them, but they have trouble cornering. Use this to your advantage by taking sharp turns to evade them.

The Bracken is a shadowy beast with black petal-like objects sticking out it. This creature’s main method of attack is to sneak up behind you and snap your neck, resulting in instant death. If there’s a Bracken lurking around, you need to keep your head on a swivel. It’s intimidated by eye contact but gets angered if you stare it for too long, so just keep turning around every now and then to watch yourself.
The Coil-Head is a nightmarish creature that looks like a giant broken doll. Touching them results in instant death, but they can only move when nobody is looking at them, so coordinate with your teammates to get everyone out safely.
The Jester is a bizarre abomination that looks like a demonic head stuffed inside of a jack-in-the-box. Upon finding one, the Jester will start winding itself, while playing the classic tune. Once the song is over, the head pops out of the box, and it’ll sprint at alarmingly fast speeds towards players, instantly killing them if it makes contact. There’s really no way to deal with this thing, and it’s advised to just leave the moon entirely if you encounter one.

The Ghost Lady is extremely dangerous, but thankfully seems to be the rarest. If one of your teammates starts hearing giggling and loud breathing, they’re being targeted by the Ghost Lady. The targeted teammate will continue to hear things, until the Ghost Lady materializes and goes for the kill.
You can slow the Ghost Lady down by doing things like teleporting the victim, but this only delays the inevitable, and she’ll continue to hunt, and she can even travel outside the buildings! Just like the Jester, it’s recommended to simply leave once you discover a Ghost Lady is stalking your team.
Tip #5: Defending Yourself
While most of the items you can purchase from the store help with navigation and exploration, there are few that focus on defending yourself from hostile threats.
The Shovel is the most straightforward item, as it’s a weapon that lets you smack hostile creatures around. A good strategy to use with the Shovel is to jump on a railing and attack from there. Some indoor creatures, like Bunker Spiders and Thumpers, cannot reach you when you’re a railing. You can actually kill some of the smaller creatures but don’t try it on the bigger ones.
The Zap Gun is a battery-powered stun gun that can temporarily stun hostile creatures. Pull the trigger to scan for targets, then once it locks on, move the mouse left and right to keep the beam straight. Couple this with a teammate using a shovel and you have a pretty reliable way of dealing with threats, assuming they can be killed, of course.

The Stun Grenade can be thrown, and it emits a bright flash, stunning anything nearby. This is similar to the Zap Gun’s stunning effect, but be careful not to look at the flash yourself.
If you want to know more about the various items in the game, be sure to check out our guide on how to use every item in Lethal Company.
Tip #6: Choosing the Right Moon
There are eight moons to explore in the game. The first three (Experimentation, Assurance, and Vow) are where you should start off if you’re new to the game. These moons have usually calm weather, and the threats aren’t as common as they are on the later moons.
Once you’re familiar with the game, you can check out either Offense or March. These moons have better scrap in them, but they usually come with added danger in the form of more creatures to deal with.
Finally, once you’ve gotten a handle on things and can reliably survive, you can go to Rend, Dine, or Titan. These three moons host the greatest amount of threats, but with even more scrap. It also costs you money to travel to these moons, which makes them very high-risk, high-reward.

When you’re looking at the list of moons on the terminal, pay attention to their weather conditions in parentheses. Generally, you want to avoid moons with weather effects, as they make your life much harder.
- Foggy: Greatly decreases visibility outdoors.
- Stormy: Lightning strikes can kill you randomly, and holding metal objects can get you zapped as well.
- Flooded: A torrential rain floods the moon’s outdoor areas, which can cut off normally accessible routes and trap you inside a watery grave.
- Eclipsed: The moon acts as if it’s always night, which means hostile outdoor creatures spawn as soon as you land.
If you’re looking for an easier time, stick to the first five moons, and if you really want to avoid headaches, do not go to any moons that are currently experiencing harsh weather effects.
That concludes our Lethal Company strategy guide. We hope this guide helps you survive the many dangers of working for the Company, and if you have any other tips or tricks to share, let us know in the comments below. While you’re here, check out our other Lethal Company guides!


Published: Nov 28, 2023 06:14 am