
Find out everything that you need to know about how to install mods in Valheim. As a beginner player, the process can be a bit confusing. However, if you simply follow our instructions, you will have no trouble installing your favorite mods. Read more below.
Manual and Automatic MOD installation
There are two ways of installing MODs in Valheim. One is by manually installing the mod of your choice. The other one is automatic. In this guide, we will show you how to manually install MODs, since many people complained about numerous issues running mod managers.
First things first, create a free account on nexusmods. To do so, follow the link and select “Register” which is on the top right of your screen. Simply, follow the process by entering your email and entering the verification code. After that, type in your desired username and password. You don’t need to upgrade to a Premium account.
Once you created your account, it’s time to download your MODs. For this example, we are going to use Plant Everything MOD.
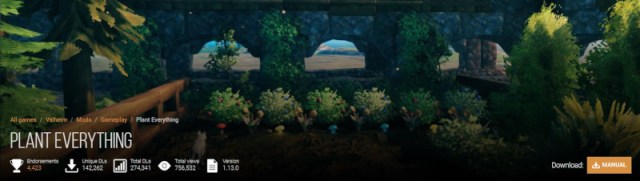
Follow the above link and select “Manual” download.
Doing this will bring a new pop-up window asking you to download some required files (BepInEx Valheim). Select “Download”. On the next page, select the “Slow Download” option.
Now you should have two compressed files downloaded.

What you want to do next is go to your Steam library, and find Valheim. Right-click on it, select “Manage”, and “Browse Local Files”. This will bring up a window with the game folders.
Go back to the files that you downloaded earlier and extract their contents. First, extract the BepInEx Valheim file. Once you do that, open the file, select all of its content, and copy them. Go back to the Valheim folder and select “Paste”.

There’s one more file that you need to extract now. It contains a .DLL file. Extract the file, copy the .DLL file, go to the BepInEx folder that is located inside the Valheim installation folder, and paste the .DLL file inside the “plugins” folder.
That’s all. Now all you have to do is simply start Valheim. On the top left of your screen, you should be able to see the version of BepinEx that you are running and the number of plugins that are loaded. You can then go make a new character or a new world, whatever you want, and simply test out your new mod.


Published: Jan 31, 2023 05:52 am