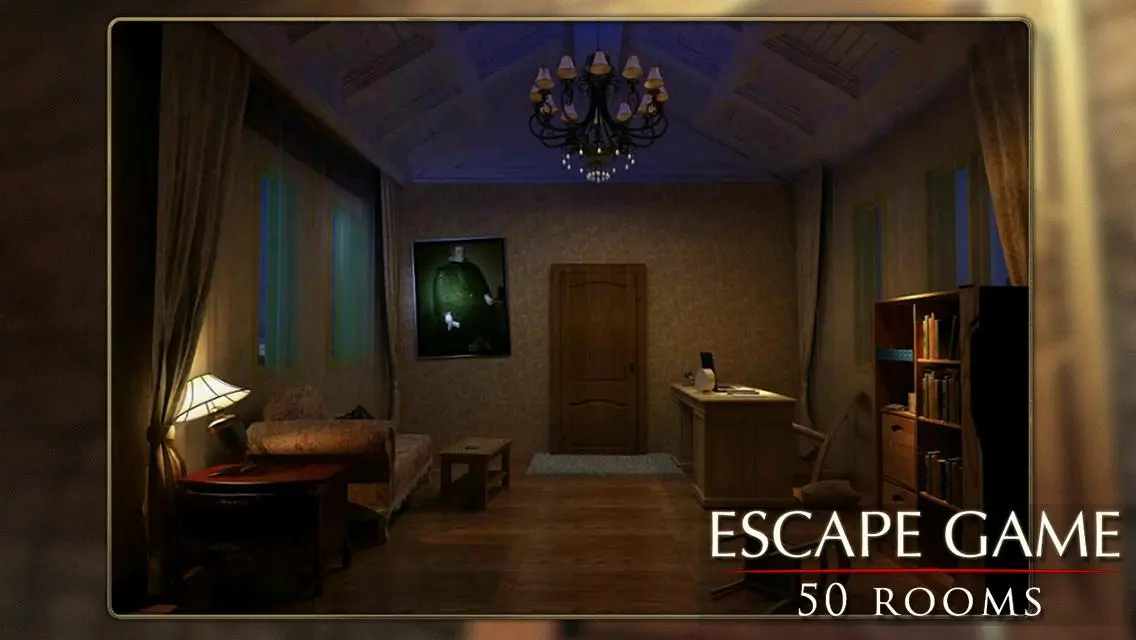
Today, I’m going to share with you the complete text walkthrough for Escape Game 50 Rooms 1, an amazing escape the room game available for Andoid only at the moment – but hopefully iOS device owners will get it as well. One of the best escape the room games we’ve played in a long time, Escape Game 50: Rooms 1, despite its strangely generic name, is an awesome title.
Extremely challenging too as you will have to think outside the box and do your best to get out of each room. But in case you get stuck, we’re here to help with the complete Escape Game 50 Rooms walkthrough.
And in today’s article, we’re going to talk about the first 10 levels in the game. So if you’re stuck at any of these stages, don’t hesitate to check out below our Escape Game 50 Rooms walkthrough for levels 1 – 10. Make sure you check out the update at the bottom of this article for a link to the rest of the walkthrough.
Escape Game 50 Rooms – Level 1 Walkthrough
1. Tap the air conditioning unit twice and get the screwdriver’s handle.
2. Go back and tap the broken TV set on the ground. Get the second half of the screwdriver and combine it with the handle in your inventory.
3. Tap the panel to the left side of the screen, then use the screwdrivers on the 4 screws. Tap the panel and pick up the remote control and the cord.
4. Go back to the TV. Tap the cord and then tap the power socket on the wall, to the top right of the screen. Use the remote control on the TV and you will see a code on the TV, like the one below:
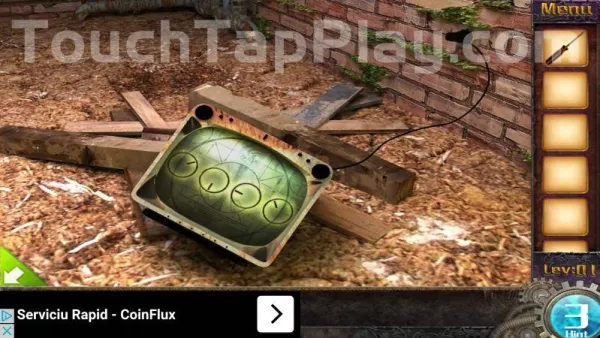
5. Go back and tap the pipes to the right of the door. Tap the panel with a “2P” on it and use the screwdriver to open it. Now tap the buttons until they are in the same position as in the image above. Tap the door and exit.
Escape Game 50 Rooms – Level 2 Walkthrough
1. Tap the flower pot and take the key. Then tap the doors on the bookcase to the right and use the key to open them. Pick up the paper and tap it to see “Taki”.
2. Tap the laptop and use “Taki” as a password. You see a new code: 1886.
3. Tap the top side of the book case and tap the safe. Use the code 1886 to open in, then pick up the key card inside. Tap the door’s handle and use the key card to exit.
Escape Game 50 Rooms – Level 3 Walkthrough
1. Tap the painting to the top left and notice the hard to see code: 7 3 9 x.
2. Tap the couch and get the key under a pillow. Go back and tap the statue under the painting, then use the key to open the shelf. Pick up the disk.
3. Tap the laptop, then tap the disk and tap the laptop again. Enter the password: 7394 (the last number obtained by trial and error). Remember the code for the dots:

4. Tap the top shelf to the right of the screen and re-create the dot pattern by tapping the corresponding dots. Get the key and use it on the door to exit.
Escape Game 50 Rooms – Level 4 Walkthrough
1. It’s time to make a burger! Tap the microwave oven and pick up a bun from it. Get the mustard from one of the top shelves, the meat from the pan on the stove and the lettuce from the left side of the counters.
2. Tap the red tray on the table and add on the bun the meat, lettuce, mustard and top half of the bun. Then take the burger in your inventory.
3. Tap the red machine to the right and place the burger inside. Pick up the key and use it to exit.
Escape Game 50 Rooms – Level 5 Walkthrough
1. Tap the shelves under the TV, open the top one and get the remote. Tap the dresser and pick up the batteries from one of the shelves, then combine them with the remote control.
2. Tap the TV and use the remote on it. Notice the code: 1096.
3. Tap the mirror to the right twice to reveal a hidden safe and use the code to open it. Pick up the key.
4. Tap the night stand near the couch and use the key to open the door. Pick up the key card and use it on the door to exit.
Escape Game 50: Rooms 1 – Level 6 Walkthrough
1. Tap the painting to the left to notice the colors: Blue, Red, Yellow. Tap the paper poster to the right and notice the numbers (1, 6, 4 at the top, 7, 2, 5 at the bottom). The color code on the piece of furniture below shows us which number on the paper poster corresponds to a color. Mixing all the info, we get the code: 5 3 6
2. Tap the bed and pick up the hammer’s handle from under the pillow. Tap the pillow on the ground to the left of the screen and get the hammer’s head. Combine the two in the inventory.
3. Tap the colored furniture piece near the door and use the hammer to remove the boards. Use the code discovered above (536) to open the box and pick up the key. Use it to open the door and exit the room.
Escape Game 50: Rooms 1 – Level 7 Walkthrough
1. Tap the box near the Sphinx to the left and pick up a screwdriver from it.
2. Tap the small Pharaoh head to the right wall and use the screwdriver to remove the panel. Pick up the hammer and the duck.
3. Tap the round vase to the bottom of the right Sphinx and use the hammer on it. Pick up the two items inside. Look at the one resembling a parchment to see the code:

4. Go back and tap the right Pharaoh head on the right wall. Pick up the other piece behind it.
5. Go back and tap the pharaoh head to the left. Using the code from the parchment, unlock the box and get the wooden bird.
6. Tap the door and place all the wooden pieces in their corresponding slot to open it and finish the level.
Escape Game 50: Rooms 1 – Level 8 Walkthrough
1. Tap the black coat to the left and get a puzzle piece. Tap the plate on the bed and get another puzzle piece. Take the third puzzle piece from the top of the large dresser and also notice the code written in red: 6:15.
2. Tap the nightstand under the painting and solve the puzzle. It should look like this before adding the three missing items from your inventory:
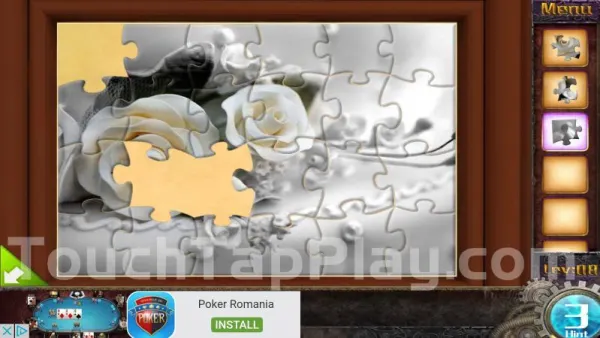
You will unlock an image, but you don’t have to remember it as it will be shown when you get to the puzzle requiring it.
3. Tap the box on the small sofa and solve the puzzle like this: tap the bottom line, middle line, bottom one and then the top one. Pick up the rings.
4. Tap the clock twice and use the rings to each side. Then tap the clock to indicate 6:15. Pick up the key and use it to open the door and exit the room.
Escape Game 50: Rooms 1 – Level 9 Walkthrough
1. Tap the barely visible pillow to the bottom of the screen and pick up the scissors. Tap the couch to the right and pick up the rod. Tap the table and pick up the piece of paper. Look at it and see the numbers.
2. Pick up a key from the plant’s pot, then tap the shelves to the left and pick up the fish line. Use it with the scissors in your inventory, then with the fishing rod. Tap the large aquarium and use the fishing rod to pick up a piece of paper. Judging from the white spots on it and combining that with the numbers on the paper above, we get the code 6832.
In order to get the code, you actually have to tap the paper with the numbers to open it, then tap the paper you have fished from the tank and tap it over the image of the numbers.
3. Tap the cabinets to the left and enter the code. Pick up the disk near the safe and use it on the laptop below. Complete the puzzle, which should look like this:

4. The color code from the puzzle is yellow, purple, green and red. Go back to the safe and use the color code to open it. Pick up the key card and use it to open the room.
Escape Game 50: Rooms 1 – Level 10 Walkthrough
1. Tap the bed and pick up the knob from under the pillow. Notice a red 2. Tap the clock above the door and notice the blue 8.
2. Tap the box on the coffee table and use the knob on the box and notice a yellow 3. Pick up a napkin from below the box and notice the green 5.
3. Tap the mirror to the left and use the napkins to clean it. Notice the code. Tap the painting to the right and use the code from the mirror (circle, star, triangle and cross). You will reveal a safe – use the colored numbers to unlock it (2385). Pick up the crowbar.
4. Select the crowbar in your inventory and tap the box under the bed. Pick up the puzzle piece.
5. Use the piece on the puzzle in the picture above the bed, then complete the puzzle by tapping pieces and swapping them to their correct place. I personally used the hints to insta-solve it, which you can do too. Pick up the key and use it to exit the room.
This would be it for now. There’s a ton of rooms left to escape from, but we’ll publish the complete walkthrough for those soon. Please share this article if you found it useful: completing these rooms takes a lot of time and getting the walkthroughs written takes even more. So please support our website by sharing this article with the world and letting your friends know about it!
UPDATE: If you’re looking for the other levels, we have published the solution for levels 11-20 here.




Published: Jan 12, 2018 10:56 am