Thanks to the ability to customize furniture in Animal Crossing: New Horizons, the player can choose different colors of furniture and dye them. A customization kit is used for this. In this guide, we will tell you how to use it.
Furniture Customization in Animal Crossing: New Horizons
The customization kit is not available from the start of the game. One animal must live on your island to access it. The next day after that, you can go to the raccoon Tom Nook and talk to him.
The raccoon will tell you that he has expanded the DIY workshop and you can dye on objects in it. Before he teaches you how to do this, he will ask you to make a piece of furniture – a wooden wardrobe.
RELATED: How to Grow and Sell Fruit in Animal Crossing: New Horizons?
When you complete the task and tell Nook about it, he will give you a reward. From now on, you can buy paint kits from Nook’s Cranny – just go to showcase (1). An item costs 600 Bells, but dying usually requires more than one item, so be prepared for more expensive purchases.
How to Change the Color of Furniture?
- You can do this in any workshop. Go to the workshop and select the “Customize something” option.
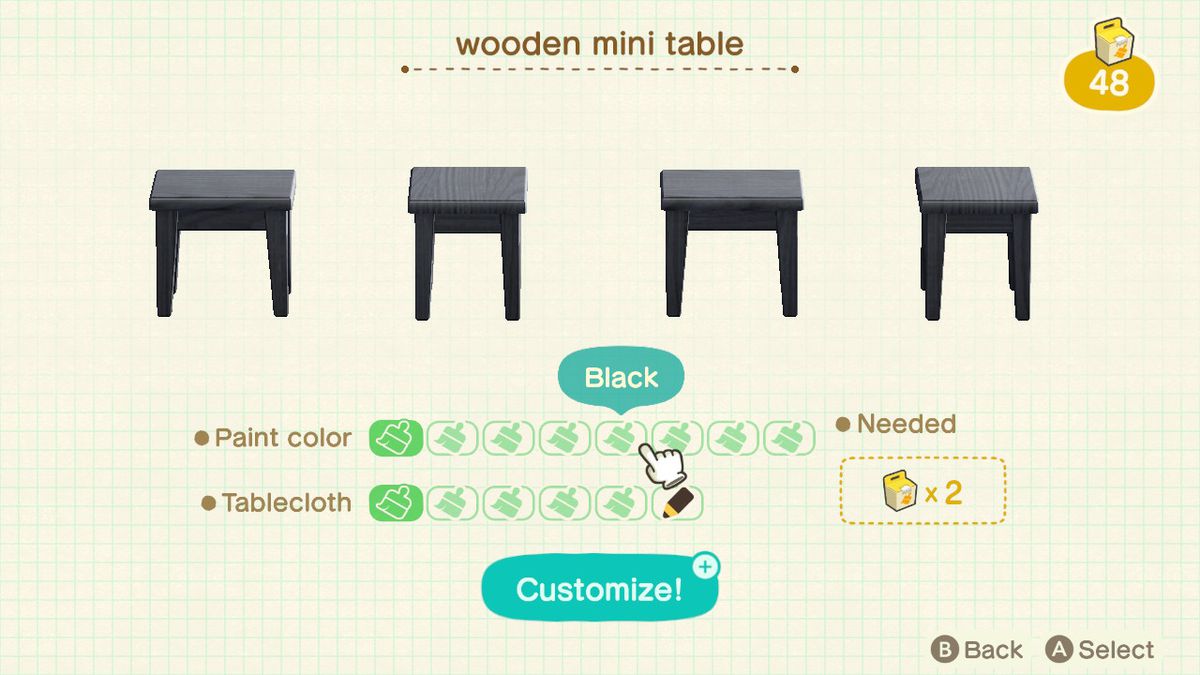
- This will open the inventory menu. Select the item you want to dye. You will be taken to a new screen, where you will set the desired color and you will see the number of required sets for customization.
- After choosing a color, all you need to do is click Customize.
Important: in the crafting menu, you can see which items can be customized. They are marked with a brush icon.


Published: Dec 17, 2021 09:56 am