After a mysterious spell goes off, you are suddenly transported into another world. Thus begins your adventure to survive in The Wild Darkness, an isometric survival game where you must build shelter, scavenge for supplies, and fight off the lurking creatures of the night!
This is a hardcore survival game, so if you die you must start all the way from the beginning. Do not worry though, because that is why we are here with our The Wild Darkness tips and tricks guide. In our guide, we will explain the basics of survival and guide you down the main progression route.
With knowledge, some practice, and a bit of luck you will be able to survive with no problems, so let’s get started with our The Wild Darkness cheats, tips and tricks strategy guide to survive the wilderness!
Take your Time and Plan out your Moves
The Wild Darkness is first and foremost a survival game, that much is clear, but it also a turn-based roguelike as well, with the randomized levels and permadeath. But did you also know that time comes to a complete standstill when it is your turn?
Like classic roguelikes, you can take as much time as you need to in The Wild Darkness. Enemies will only move and attack after you have, so try to approach combat so that you are not at a disadvantage.
If you walk up to an enemy on their turn, they will attack you immediately. Instead, use the wait command (the stopwatch button) to skip your turn and stay still, which will cause enemies to come closer to you. Then, you can land the first strike on them.
Never blindly attack enemies! Watch your health and your surroundings, and make sure that you make every turn count. If you have multiple enemies coming for you, funnel them into narrow corridors so that you are not getting hit from multiple angles.
You should know that the in-game clock also pauses when you are simply standing still. If you are trying to figure out what to craft or do next and you are looking through your lists, worry not because time will not advance so as long as you are not moving.
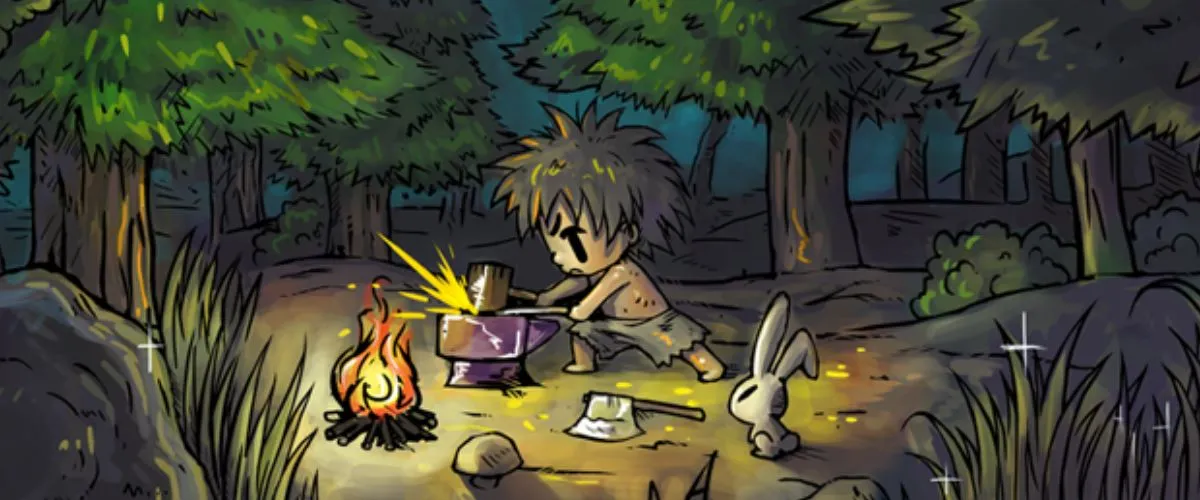
Craft Basic Tools and Scavenge
The in-game tutorial will teach you how to craft basic tools, like the Stone Knife and Stone Axe, which let you gather bush and logs respectively. You will unlock more basic tools as you progress, but for now this will provide you with the means to create fire which is important to survival.
Get into the habit of collecting everything you see – there is a use for every single item in the game, and although you will be hard pressed for inventory space early on, you can always drop things and come back later.
The worlds are persistent for each character, so items on the ground will stay there until either you or an enemy comes to collect them.
Keep Torches on Hand
When night falls, abyssal creatures will begin to spawn. These creatures are highly resistant to damage if you do not have a source of light, so make sure to keep a torch on hand at all times. When an abyss creature gets close to you when you have a torch out, they will shrink and become much weaker.
You will find that night traveling happens often since your energy drains at a somewhat slow rate, allowing you to explore a lot before needing to turn in for the day. Of course, do not let this stop you from resting early if you need to heal up.
Keep in mind that you can take torches off the walls of dungeons if you ever find yourself in a predicament!
Head into the Suspicious Dungeon
Your first order of business is to repair the Ruins of Light, the shining pedestal in Forest Entrance, after getting situated and building your tools, of course.
The Suspicious Dungeon consists of two floors, but the second floor is small and all it contains is a boss room. Make your way through the dungeon grabbing any materials you can find along the way, and prepare for the boss battle.
You will go up against a giant guardian, but at this point in the game you will not have any armor or weapons save for the basic tools that can be used as makeshift weapons, so it is not too hard of a battle.
Once the guardian is down, a small room to the side will open up where you can find the missing tablet. Return to the Ruins of Light to place the tablet it, and now you unlock a whole bunch of new recipes.
Death is Not the End
At this point you may continue your adventure and try to craft the new recipes. You probably have noticed but your fighting ability is sort of lacking, as most of your attempts to strike are misses.
You can keep going, but eventually you will find yourself losing battles left and right. If your health drops all the way to zero, your character will die and that is the end of their adventure. However, death is not the end!
The character’s accomplishments and feats are collected into a black cube, which are the remains of the character. On the main menu, you can spend keys to open remains to receive star gems (the premium currency), new recipes that carry over between characters, special totems, and more. Keys regenerate automatically over time.
Totems are permanent boosters that can be equipped at the start of a run. There are three types of totems: survival, battle, and magic. Totems grant you passive bonuses and can even influence you into a certain playstyle, so make sure to read up on each one.
The further you progress with a character, the more awesome stuff you will get out of their remains cube. You can see how many star gems your character is currently worth by the number at the top left corner of the screen. Try to get as far as you can before you bite the dust!
Try the Warrior
For restoring the Ruins of Light (the first stage, at least), you will unlock a new character class. The next time you start a new game, you can choose the Warrior class, who excels at fighting and taking hits. Sounds like just the thing you need, right?
Once your first run is over, we highly recommend switching over to the Warrior. The Warrior has slightly higher strength and stamina than the Adventurer does, but he also starts out with passive skills that allow him to take advantage of armor and weapons better.
The combat difference is like night and day – the Warrior can hit much harder and can withstand more blows than the Adventurer can, so we recommend starting your next run as the Warrior instead.
Carry some Cooked Food
You will come across random fruits and vegetables as you explore the land. You can eat them right away for a small hunger boost, but you can also cook them together to make delicious recipes that restore a lot more, although you will not unlock the Cooking Pot until much later in the game.
You can also just make a temporary Campfire to cook some food, since logs and bush are pretty easy to come across. Food takes a while to expire, so do not feel pressured to cook your food as soon as possible.
Cooked food is mainly for satiating your hunger, but remember that it also heals a bit of health. You can down some food on the good if you are hurting for health. You can also heal some health over time slowly with bandages, but you want to save those for when you are actually bleeding.
Only Drink from Water Sources
In a pinch, you can drink water from any water tile. However, there is a very good chance that you will become poisoned from the untreated water, which is shown as the food poisoning status effect in your status.
Food poisoning will reduce your stats and make you deal less damage, and it can stack over time, making it a very nasty status effect. Try not to let it come to this!
Instead, keep an eye out for water sources. They look just like regular water tiles, but they are kind of bubbling and they will be marked. You can drink freely from these sources without fear, and you can even bottle up water to save it for later.
Get to Strange Forest 2 to Unlock Fast Travel
In general, the best place to start building your base is near the Ruins of Light in Forest Entrance. Most players will naturally build their first base here, and for good reason!
When you get to Strange Forest 2, you will find a dungeon called the Dimensional Dungeon. It has two floors just like the previous dungeon, and at the end is a mighty golem boss. The golem is a little tougher than the previous boss, so make sure you have a few pieces of armor and a decent weapon.
After you defeat the golem, your prize is a fragmented tablet. If you bring this to the Ruins of Light, it will turn it into the Dimensional Tablet. Using this tablet will immediately bring you back to Ruins of Light, offering you a quick way to return to base.
However, the Dimensional Tablet must be charged after uses, and this is done with Mana Motes, a somewhat rare material.
As you progress further in the game, you will come across other Ruins of Light, and you can travel between them at will, enabling the use of multiple bases!
Craft Everything
As you upgrade the Ruins of Light, you will unlock additional crafting recipes. Try to make everything at least once – there are many items that will not be able to craft until you craft the prerequisite item.
It is important to do this as this is part of the main way of progression in The Wild Darkness. Usually, it goes something like this: craft new gear, explore a dungeon, find an important material, upgrade or craft new workbenches, and use that new gear to get stronger and explore more dangerous lands.
That is all for our guide on The Wild Darkness. If you have any other survival tips to share, let us know in the comments below.


Published: Jun 2, 2020 11:01 am