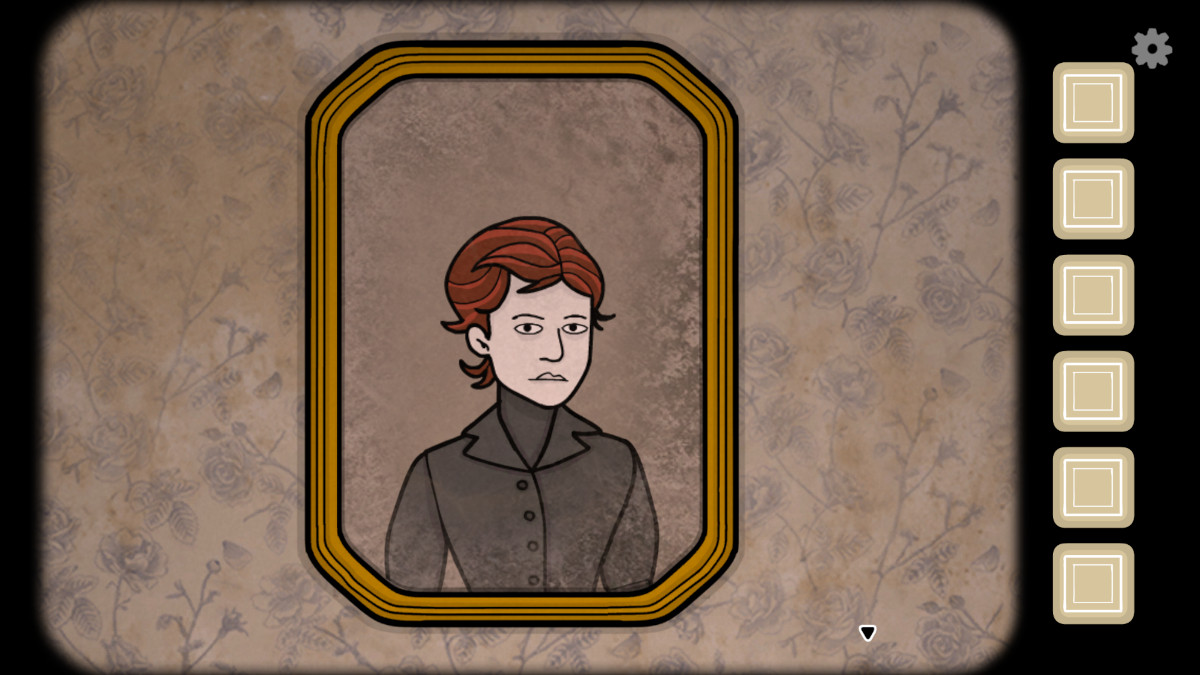
In order to investigate the laboratory, the future must first operate the machine where you put the bones, flesh, and blood. You will discover papers on the table at the start of chapter 2 with a code printed on them that Past must enter into the computer.
The Past must move the Bone, Flesh, and Blood from the machine to the right side, where the terms for the Resurrection Process are written, and then enter the code. Type in following: Z1X23Y
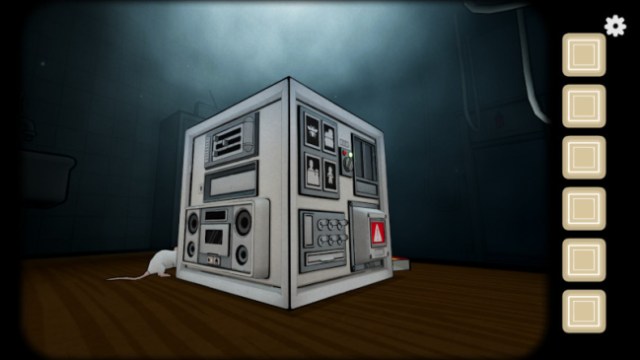
After solving this problem, another note will emerge with 9 buttons, 6 of which are highlighted. Get the Black Cube from the machine and put it in C-9.
Place the Black Cube and push the buttons in order:
On the left side, there are three buttons in a vertical line.
On the right side, there are three buttons in a vertical line.
After pressing the Black Cube, the future will experience some memories from Chapter 1, and Albert’s shadow will materialize within the cylinder of the gigantic machine.
Click the clock beneath the console and push the button to reset the hands. When you push the clock button, the arrows change:
11 is black, 1 is red, and 3 is white.
The future must indicate the position of the same clock hand, and then each switch must be set to the matching number.
After you arrange them correctly, the past will see Albert’s Shadow within the cylinder via the Future’s sight.
You’ll notice a music key next to the eye on the machine; swivel it to the next side to access the piano part.
You’ll notice “78.3” when you open the piano. You must remember this number to tune the radio in the locker room. Merely click it and change the frequency to the piano’s number.
Once tuned on the proper frequency, the future will hear musical notes from the radio and must inform the past to play them on the piano.
“AGAB” are the proper piano notes.
After playing the proper piano notes, the number will change to “114.3”. Now, the future must tune the radio to a new frequency and give the past new notes to play on the piano. CDEG notes.
The past must play this note again, then another number changes. “103.7” is the third radio setting. After changing the frequency again, Future will get a third note, “EDEC,” to play on the piano.
By playing the third note, the final number “89.1” will disclose the radio’s “BAGA” note.
After this piano note is played, a Tooth Key appears. Take up the Tooth Key and twist the machine to the front to unlock the Bone Substance Lock.
When you insert the key, the container closes and highlights switches. The Future must next go to a chamber with another enormous machine to obtain the chemicals the Past has gathered.
Six movable switches must be installed in the same sequence as the indicated switches on the Tooth lock compartment.
When the switches are in the appropriate sequence, the gadget opens to reveal a large tooth and chalk.
After picking up the chalk, go to the blackboard beside the lockers. Draw shapes and a code on the blackboard using chalk.
The blackboard code is “X3Z1Y2,” and Past must enter it into the gadget to get a fresh note with distinct terms emphasized.
The Future must circle the correct items on the blackboard.
- Second shape, first row: coffin
- 6th row, 2nd shape: eyes
- 4th row, 3rd shape: soul
- 6th row, 1st shape: cube
- 3rd row, 5th shape
- 5th row, 2nd shape: bone
- Third shape, second row
- Third shape, third row: blood
After you circle them in the appropriate sequence, the hammer will appear. Shatter the tooth with the hammer and utilize the vacuum pipe to transfer the fragments into Shadow of Albert’s cylinder.
A flashing light beneath the Bone indicates that the bones must be placed in the cylinder. Flip the switch to connect the bones to Albert’s Shadow. Click on the clock again to reset it, and the arrows will stop in a new position: black on 4, red on 6, and white on 1. Again, adjust the eye-looking device’s switches to match the clock’s arrows.
Behind the eye is Albert’s skeleton. After zooming out, a Nut Driver will appear. Open four nuts on the device’s rear.
After opening the device’s cover, you’ll notice a missing mechanism. Leave the machine and follow the rat into the shattered tile. A broken tile contains a key. This key opens a locker containing blueprints.
The Future can uncover three hidden metal cogs on the blueprints. The Past must spin the machine to the front to discover one cog on the left side of the blood and another on top of the flesh.
After finding the first two cogs, turn to the machine’s mechanical side and look inside the left frame.
To start the machine, you must insert all three missing cogs and turn them. A doll on a hook will drop when the mechanism works. The doll and hook will fall if you push it multiple times.
Take the hook and proceed to the ear device. In the ear compartment, hook the rope and flip the switch to raise the ear.
Lifting the ear reveals a board with three switches. Click the computer in the locker to see whether the prior person received all the missing gears.
You must push down to see the Hook, Ear, and schematic to Past to put the notches on the board.
- 5th notch, 1st column
- 2nd column-2nd notch
- 2nd column notch
Once the notches are in the right sequence, a new board with arrow instructions appears below.
After entering the arrows, a new screen with a hook and a code will emerge.
Past must use this code to receive the next clue. It’s “Y3X1Z2.”
After inputting the code, a schematic of the blocks will display the correct route. Following three computer locations in the appropriate sequence, the ear will appear.
In the ear room, pick up the glass and return to the locker room. Scalpel is in the middle drawer.
Go back to the ear and cut the little bit of Flesh off it. The Future will notice a screen claiming there is a missing heat.
Now you must ignite the gas burner with matches to see missing coffee.
The locker’s bottom shelf has a coffeemaker. After making coffee, the screen will say that water is lacking; to retrieve it, use the glass you picked up before to fetch water from the bathroom.
Last missing component is Flesh from your goods. Place it on the functioning table, and you’ll get a code.
You must input the code in the three-path puzzle to obtain instructions on how to add the liquids.
First, pour on acid, water, and hot coffee.
Once the liquids are poured in the appropriate sequence, a new machine code will appear. It’s 1Y3X2Z.
After using this code, pour the liquids in the following order: Coffee, hot water, water.
You’ll get a third code to pour liquids into the machine in Step 3.
The third code is “2Z1X3Y,” and after Past uses it on the machine, you’ll get a Step 3 notice requiring you to pour the liquids in the following order: Water, acid, water.
After this, you’ll see the fourth and final lab code. Pasting 1Y2X3Z into the machine will give you step 4 for pouring liquids.
Step 4: Acid, water, water.
As you pour all the liquids in the correct sequence in each stage, you’ll see “Complete” on the screen and the flesh will move into the pipe and reach Albert’s bones in the cylinder.
Once the flesh is in the cylinder, the light above the Flesh button will blink, indicating you must push it.
Once you’re done with the Flesh, reset the clock for the third time and inform the Past where the clock arrows are; he’ll put the buttons accordingly.

White, red, and black arrows are on 12, 10, and 7. Knowing this, the past will return to the eye-looking switch and align all the colored switches with the clock’s arrows. Behind Albert’s eye, you’ll see skin. By disclosing this, the machine gives you a Valve for the Blood Substance’s left side.
Turning the valve transfers blood from the bottle to a console via left-side pipes. Pull the console lever to see various forms. The Future must then walk to the room’s sides, where a butterfly will toss a locker on a mouse. Click the butterfly to have it fly away, then grab the key.
Use the locker key to get another valve. Switch to the Past and install the valve on the enormous machine. Turn the valve to open the console lid, then click it.
Turn on the machine and follow the icons for Past and Future to fill the meter before it turns red.
To reset the needle’s timer, push the machine’s proper symbol and shape and the pump above the buttons.
Simply press the symbols in order:
- Past: Butterfly, Eye, Reindeer, Soul, Crow, Heart, Tree, House.
- Future: 4th button in first row, 1st button in first row, 3rd button in first row, 4th button in second row, 3rd button in second row, 1st button in second row, 2nd button in second row, 2nd button in first row.
After this, all the blood will flow into the machine with the cylinder, and the Blood light will flash, indicating that you must activate and pump the blood.
After pressing the blood switch, reset the clock and the arrows will halt on 5 on white, black on 9, and red on 3.
The Past must align the switches with the clock’s arrows to get a Hex Key. Use the Hex Key to open the cover on the device’s side where he utilized the blood console.
Unlocking the lid reveals the scope.
Turn to the Future and push the console with the highlighted black cubes. Past must then gaze through the scope, see a candle in the black mirror, and switch the scope into a Candle Stand.
Change the scope for each highlighted button. Once you push them in sequence, the cylinder’s glass will crack and Albert will stroll to the locker.
In the next room with the locker, you’ll discover Albert suited up and telling you it’s not done.
He’ll instruct you to escape and show you a code in his pocket. The code is “3XY21Z”; instruct the Past to input it.
The computer will show you a memo with highlighted terms; utilize them with Future and circle the symbols with chalk.
Circle these symbols:
- 2nd row, 6th shape – Eyes.
- 5-shape, 3-row – Future.
- 3rd row, 1st shape – Mask.
- First row, first shape – Gems.
- 6th row, 1st shape – Cube.
After correctly circling all the symbols, the golden key will descend. This key opens A. Vanderboom’s locker. Music Mask, Deer Mask, and Snow Mask are included. Now flip to Albert, who wants a mask. Give him the Snow mask to release the butterfly. Press the logo while the butterfly is on it. It opens with three gem-slotted figurines.
Reset the Future’s clock. The arrows indicate switch numbers. 11 white, 2 black, 5 red.
Knowing these numbers, move to the Past, utilize the eye-looking switcher, and position all the color switches according to the clock directions. You’ll see Albert with a mask on, but the screen will go black.
The machine then gives you a voodoo needle. Rotate the machine so the doll is on the ground, then insert the needle into its eye. It opens the doll’s stomach sutures, where you’ll discover a diamond.
Rotate the machine to the figures with gem holes and put the first jewel. Place the Deer Mask on Albert to see a schematic of notches. Paste these notches into the machine. Once you align the notches, the second gem will appear.
Again, turn the machine to the side with gems and insert the second red gem in the center figure. Give Albert the third music mask, then go to the radio to hear the notes. Note “FGDC” is needed. Use this note in the Past to uncover the third golden gem.
Place the golden gem on the machine’s final figure to make it spin. A golden cube will emerge on top of the machine, and Albert’s shadow will grasp it.
Go to the Black Cube Machine in the Future. You must push the buttons in the sequence shown on the golden cube.
Once you hit the buttons on C-9, you must give Albert the black cube. Future and Past must each hold the cube for 10 seconds. It will show Albert and his shadow holding cubes, then tell you to stop. Answer a few questions, and Albert and Rose will finish at the lake and convert into a flowering tree to end the game.


Published: Nov 23, 2022 02:53 pm