The first chapter of the Past Within game is going to be covered here in this walkthrough. Find out everything that you need to know below!
The Past Within is a point-and-click adventure game for two players that takes place in the enigmatic realm of Rusty Lake. Both of the players will have the opportunity to choose a side, either from the Past or from the Future. Following the selection of a side, both players will be given the opportunity to act out the narrative based on that side.
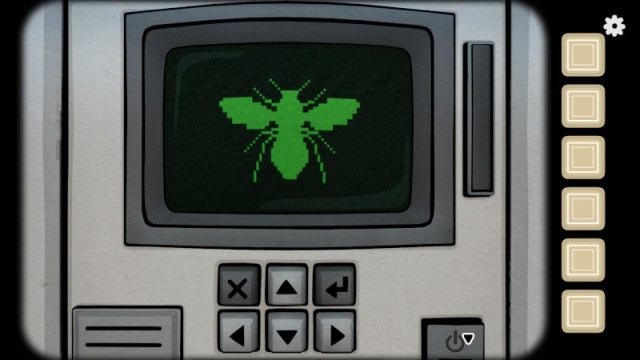
After choosing a side, the game will question you on whether you trust the person who picked the other side, and then it will have both of you choose a photo from a set that includes a bug and a butterfly. The first part of the game will start after you’ve selected the same icon many times in a row.
The Past Within – First Chapter
Both of the athletes will be identified by the side that they have decided to take. One player will take on the role of the Past, while the other will take on the role of the Future.
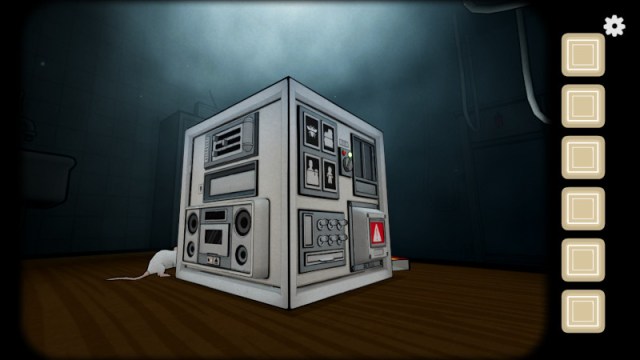
When we first look at Future, which opens this chapter, we will be examining a machine that is quite similar to the computer. On the other hand, Past will have a letter on the left side of its screen, and on the right side, it will have a box with nine little buttons on it. In order to switch the machine on, Future has to click on the Red Switch that is located on the computer.
Once he does this, the screen of the computer will light up. The words “CUBICAL DEVICE 01BF” will appear on the screen as soon as it is turned on. Memory of the individual’s chamber from the past is stored in the Cubical Device, which the person carries with them. Now is the time to make sure you are in communication with the other players, as you will need to speak with them during the whole of the game in order to assist one another and win the game.
When you move to the next screen of the Cubical Device by pressing the Enter key that is located below the screen, it will inform Future that you are going to build a connection with the person who was living in the past. It is necessary for Past to first open the letter, then read the date that is printed on the letter, and then relay this information to Future.
To go on, you will need to provide the machine with the year 1926. Now you need to explain to Past what the flashing blocks on the screen mean in order for him to open the box. Confirm on the gadget that the box has been opened by the Past. The Past will then locate the matchbox, and it will teleport to the Future. You may access the Switch by opening the Matchstick.
At this point, Future has to activate the gadget by pressing the switch that is located on the left side of the device. Simply place the switch into the P-17 slot, then activate it by clicking on it and dragging it to the left. The left side of the screen will display four images, and in order to arrange the images in the correct sequence, Future and Past will need to have a conversation about it.
You need to make two trips to the right side as a Past in order to see all four paintings that are hanging on the wall. The sequence of the photographs should look like this when completed correctly.
- Top Left – Crow Painting
- Top Right – Butterfly Painting
- Bottom Left – Tree Painting
- Bottom Right – Albert & Rose Painting
Once all of the paintings are rearranged in the correct sequence, Future will be able to place the various symbols in the appropriate locations. To complete this step, Past must click on the box that is located on the ground beside the paintings. Now, you need to explain the symbols to Past in order for him to open the box. The box is going to open, and Past is going to collect coal. After that, Past is going to have to utilize the coal in the fire pit. When Past uses the coal in the fire pit, he will be presented with a graphic that consists of three rows with five notches in each row just above the pit.
Now, Future has to turn the gadget around so that he is looking at the back of it so that he can see the same pattern that Past has in the illustration. In order to place the notches in the appropriate location, you should ask Past what he sees in the diagram. The accompanying diagram illustrates the proper placement of the notches.
2nd Notch on 1st Row – 4th Notch on 2nd Row – 1st Notch on 3rd Row.
When all of the notches have been positioned, a battery will emerge from a tiny container on the right, and the apparatus will begin to smoke in the same manner that it did in the chamber with the Past. Take hold of the battery, and then place it in the slot on the right side of the gadget. The smoke will begin to escape via a little fan that will begin to spin as soon as the process begins.
In addition to that, a timer will be shown above the battery that reads “17:15.” You are going to need to inform Past of the time, and then Past will have to flip the focus of the area to the clock and set the time to “5:15.” The smoke in Past’s chamber will gradually begin to dissipate. It is imperative that Past be moved to the Coffin screen, and the image of Albert will eventually disintegrate. If you pick up the photo, Past will locate a key for you.
In order for Past to locate the face mask, he must first place the key in the second drawer. After you have equipped the face mask by clicking on the mirror and putting it on, Past will see that his room has taken on a wintry appearance. Proceed now to the double door that has glass on both panels and a variety of designs and symbols etched into it.
Future will discover a key and a photograph that depicts the moment when the fan began to rotate. In order to use the gadget, he must position the key so that it is below the little circle that is located on the right side of the fan. After inserting the key and rotating it in order to unlock the circular frame, Future will be able to see a form that resembles an eye.
Additionally, three distinct symbols will appear outside around the eye, and Past will need to indicate the placements of the symbols around the eye form on the glass door that is located in the lower right corner of his screen.
When the symbols are a match, Future will be able to see through the eye, and two different forms will stand out. It is necessary for Past to click on the shapes, and this will cause the symbols that are surrounding the eye to change. After the symbols have been moved to their appropriate locations, further forms will become highlighted, and it is necessary for Past to click on those shapes.
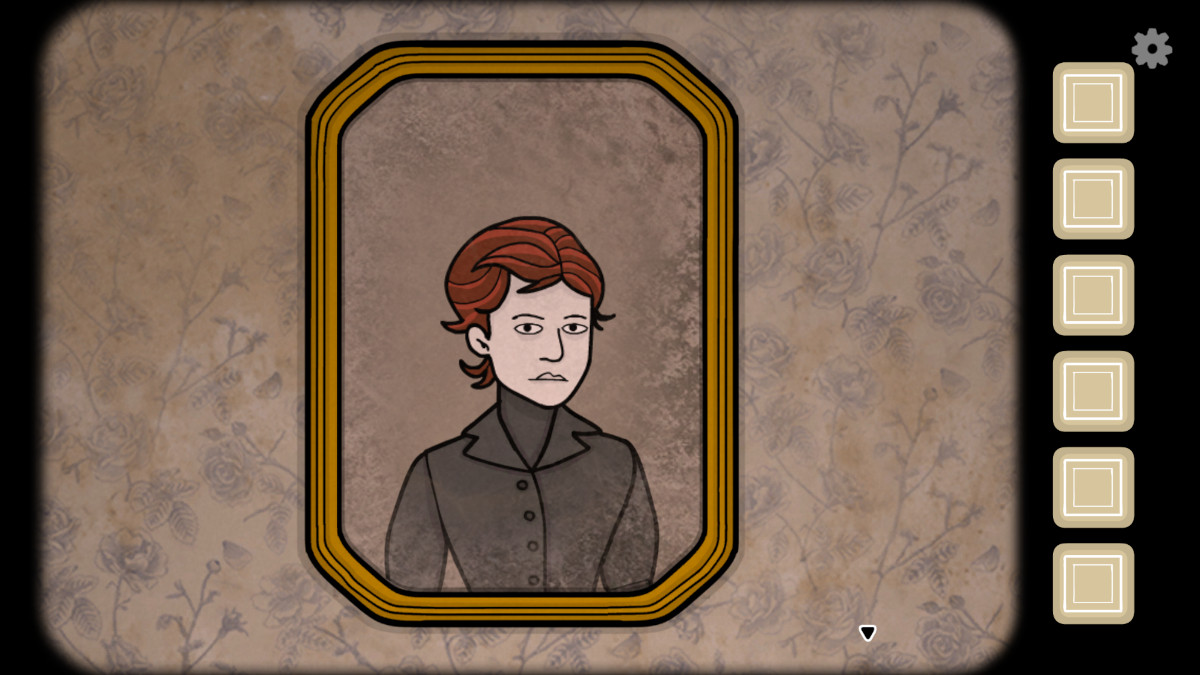
Future must be informed once again of the placements of the symbols. The symbols will continue to alter, and then they will have to go through this procedure once more before the door will finally open and they will be able to see each other. Rose will observe Future wearing the face mask, and Future will observe Rose looking at the gadget.
On the right side of the cabinet on which the gadget is stored, Past will discover some documents. Those papers will include the placement of the various switches. It is necessary for Future to be informed of the current settings of the switches by Past. It is necessary for the gadget to be turned so that it is oriented so that Future is facing the left side of it. Future then has to turn down the first two switches in the first row, as well as the second switch in the second row.
After a tape has been removed, Future must then place it in the device where it was originally stored. The image of Albert Vanderboom on the coffin will appear when the tape has been loaded. In order to see the name, Past must first go to the screen displaying the casket and then click on the coffin. In order for Past to unlock the casket, Future must first inform Past which letters are flashing on the coffin, and then Past must click those letters.
In order to go to the next page, Future has to hit the Enter key on the device. Once there, the gadget will inquire about the item that is most similar to Albert. In order to get the code, Past must choose the pocket on the front of Albert’s coat and click on it. That is the code that has to be entered into the computer by Future. After then, the apparatus will display three distinct materials: bone, flesh, and blood.
To open the locked cupboard, Past must first lay the orange triangle that he discovered inside the coffin on top of the cabinet. Bone, flesh, and blood are the same three symbols that will be found in the past.
The Materials
Flesh:
In order to complete the Flesh, Past must first position all of the candles, and then Past must position the journal inside the Flesh area of the cupboard. There are many locations throughout the room where you may find the lantern with the candles hanging from the ceiling. Move around the different regions to locate the candles, then set them on the stand that is immediately next to the casket.
If you use the match stick to light each of the candles, you’ll be able to get a key from one of the candles. To get the diary, you will need to use the key that is in the first drawer. Put the journal under the section labeled “Flesh.”
The left-hand side of the gadget will display a screen at some point. It is necessary for Future to explain the images to Past, and it is necessary for Past to use the pencil to complete one of the blocks in accordance with the feelings that are written on the right side of the blocks by Albert.
Because the feelings will correspond to the photos, it is imperative that the Future and the Past connect with one another. The following is a sequence for filling in the blocks that Past needs to complete.
Bottom Right – Top Right – Bottom Left – Bottom Right -Top Left – Top Right.
Bone:
If you look at the back of the machine, you’ll see a row of 20 buttons. If Past pulls the handle, he’ll reveal an implement that can be used to pry open Albert’s jaws. In order to extract the tooth from Albert’s mouth, the Past must first insert the tool into his mouth, and then the Future must indicate the button’s flashing location in the Past. Until Past obtains the necessary teeth, it’s important for them to stay in touch. To go onto the online content, Future must now confirm the tooth sequence with Past on the device.
Blood:
In order for Future to proceed, the Blood ingredient must first be selected, and then the gadget must be rotated to the right. A block will pop up, and within of it will be six buttons that may be used to correct the code. Future requires that Past reveal the secret code that is inscribed on the blood container that is stored in the cabinet. After entering the code “3XZY21,” a message will appear indicating that there is a secret message hidden behind the tree. To view the painting of the tree, Past must go to the painting area and click on the painting of the tree. There will be a new code revealed.
Now, Future has to input the code “X2Y13Z,” and the new message will inform them that there is a message in their own reflection. The secret will be revealed if the past is examined carefully in front of a mirror. In order for the gadget to display a photograph of the space, Future must first type the code “YX31Z2” into it. The Future has to inform the Past that in order for him to complete the task, he must travel to the paintings area and check the box.
After that, rip the sheet that is contained inside the box to reveal a new code as well as a spoon. The future only has to input the code “XZY312,” and then the gadget will tell them to consume the soup in order to discover the present. It is necessary for Past to get the soup bowl that is sitting on the chair that is immediately next to the box and place it on the fire pit.
After some time has passed, seize it once again and transfer it to the plate that is situated on the table in the space designated for the drawer. Consume the soup with the spoon that Past discovered, and he will uncover an emerald-colored jewel.
Put the gem in the blood area of the closet to unlock the compartment, then give Past the bottle and the cotton swab it contains. The cotton swab has to be inserted into Albert’s left nostril and gently pushed in a few times before Past can go on to the next step. Use the container to catch the blood that will flow out of the right nostril, which is where it will come out.
Now, the Future has to verify to the device that the Past obtained all of the components, and the gadget will inquire about the year that the Future will be in. On top of the cabinet will be a mechanism, and in order for it to work properly, Past will need to set all three items in the appropriate portion of the mechanism. The following is an accurate listing of where each material should be placed.
Blood in Top Left – Tooth in Bottom Left – Flesh in the Right.
A new letter, on which the year of the Future will be inscribed, will be revealed by the system. Provide Future with the year so it can log into the system. To go forward, the gadget requires that the year “1984” be entered. The screen of the device will display an image of a red tree, and then it will start to eject the tape. The mechanism will communicate with the future and instruct it to engage in a game of chess with the past.
To insert the tape, you will need to rotate the gadget so that it is facing its back. There will be a moment that seems to be “19: 45,” and the Past will need to adjust the clock to read “8: 45.” Everything in the room will begin to tremble, and as the shadowy figures move around the different sections of the room, a vase that is directly close to the coffin will shatter. Find the key by looking inside the shattered vase, and Past will be there.
To get two chess pieces, you will need to use the key that is located in the third drawer. One of each color, white and black. At this point, Past is responsible for moving the chess pieces to the board that is located on the table that is located close to the fire pit. The white chess piece should be placed in the bottom right corner, and the black chess piece should be placed in the bottom left corner of the board.
On the other side, Future will get a Screwdriver, which he will need to use in order to loosen the bolts that are located on the left side of the device. When the bolts are opened, a chess board will fall out along with two chess pieces—a black knight and a white bishop.
It is necessary for the Future to maintain possession of the white chess piece, while the Past must maintain control of the black chess piece. The white chess piece will move independently in whatever position it is in at Past’s end; however, Past has to communicate this information to Future so that Future may move the white chess piece into the same position it was in at Past’s finish. When Future plays a move on the white chess piece, the black chess piece will move on its own.
After that, Future will need to communicate with Past about the location of the black chess piece so that Past may move the black chess piece to the same place on his chess board. Both of them will have to engage in conversation for a number of rounds; thereafter, Past will retrieve a coin from the edge of his chest board, while Future will be given a red floppy disk.
In order for the gadget to work properly, Future has to remove the yellow floppy disk and replace it with the red one. The screen will display a terrifying figure, and the Past will be required to put both coins in the eyes of Albert’s body in order to proceed. It will become black all over his body, and he will seek your assistance. On the other side, the gadget will begin to make a beeping sound.
You will need to use Past in order to rearrange the positions of all of the symbols, notches, and other components once they have been moved about. It is necessary for the notches to be rearranged in the following sequence in the future.
5th Notch on 1st Row – 2nd Notch on 2nd Row – 4th Notch on 3rd Row.
Make the following adjustments to the switches that are located on the back side of the device:
3rd Switch Down in 1st Row – 3rd Switch Down on 2nd Row.
Adjust the other switches so that they are in the on position. Afterwards, modify the symbol in the eye so that it corresponds with the wall that is behind the coffin. Fuses will be found by Future, and Albert’s ghost will seem to be standing behind Rose. When you put in all three fuses, a door will open on the left side of the gadget that houses a tiny compartment.
If you pull the switch, the time that is shown on the screen will change. It will be “21: 10,” and Past will need to change the clock back to “9: 10.” A prosperous relationship will be established, and the Golden Cube will be obtained from the shadow of Albert by Past.
Chapter End
After you have placed the Golden Cube on the mechanism that is located above the cupboard, the Future will need to check everything that has been taking place. After that, both the Future and the Past will need to press and hold the up key for 10 seconds before the start of the next chapter.


Published: Nov 22, 2022 01:16 pm