
With the cold weather outside, Symmetry Go is the perfect mobile game to play right now. Challenging you to survive for as long as possible in the harsh, freezing environment on that strange planet, the game is unforgiving to the player. But I’m here to help you with some Symmetry Go cheats and tips, so that you survive for at least 100 days.
The thing in Symmetry is that the beginning is usually the most difficult. But once you get a system going, things are relatively easy in the long run. But getting that system going and getting past the first few days is critical. But we’ve got everything covered in this guide for this absolutely amazing game.
So let’s not waste a single second and instead let’s check out below some Symmetry tips and tricks for the amazing mobile game!
How to survive at least 100 days in Symmetry
This is what we’re going to talk about in today’s article. If you manage to survive at least 100 days in the game, you will unlock the Story mode which is probably a lot more exciting than the plain survival (which, truth be told, becomes a bit boring eventually).
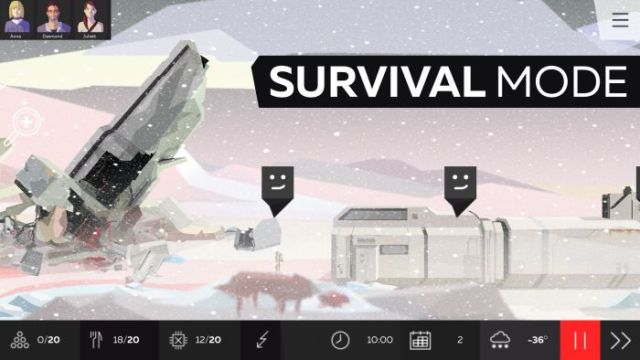
But getting there is difficult, as this first screenshot I captured after my first try proves:

Reset your progress if you’re having a bad start
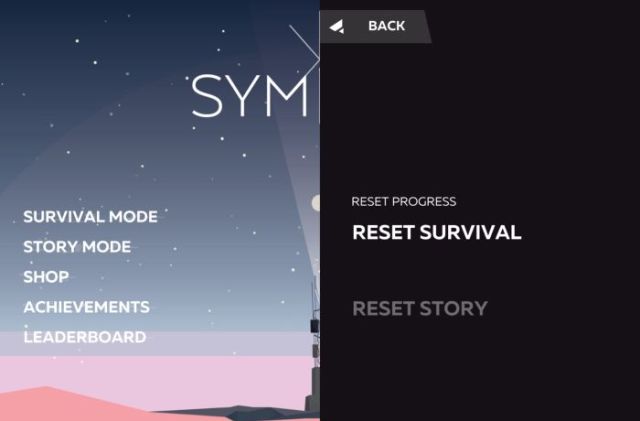
If you’re having a bad start like mine in the image above, you should simply reset your progress and start from scratch. The game saves automatically when a new day begins, so you will have to manually reset your progress if you want to start afresh.
In order to do so, tap the bar to the right when in the main menu (where you can continue your game or check the leaderboards) in order to reveal the menu. From there, tap Reset Progress and select “Reset survival”:
Try to train your survivors as soon as possible
There are four total skills your survivors can have in the game, all related to resource gathering: wood, food, junk and energy generating. When you start a game, each of your survivor will know more or less of a particular skill, usually each of them having knowledge in 2 skills.
Based on what they start with, you will have to specialize them. Early on, you will only need three specializations: a food maker, a wood cutter and a junk collector. Somehow, as soon as you have a bit of surplus and you can afford to take some time off from collecting, you will have to train those survivors in their main skill.
You have to try to max it out as soon as possible in order for them to gather as much as possible in one run – the lower their skill, the more time they will waste going back and forth with just a few items in their inventory.
Skills and your survivors
But training your survivors in one skill won’t be enough for long. I recommend having two of your survivors master two skills each, and have one who’s able to do 3 things – and do them well.
The third skill that you want to train is the one related to the battery recharging. You don’t really need that maxed out – so just a bit over half should be OK as the battery is not vital in the game and you will only need to recharge it every now and then.
My recommendation is to start developing your food maker into a jack of three trades: since food is the easiest resource to get because it’s produced inside the base, the “cook” will have the most time for study. He or she should master food production first, then work in either wood collecting or junk collecting. I recommend the former, because wood goes away faster than junk early on. Then, after some time goes by, you should have your “cook” learn some battery recharging as well.
Next, we should focus on the Wood Gatherer. He or she should be trained to be able to scrap junk as well. Focus on mastering wood gathering, but make sure that the junk gathering level is as high as possible (maximum ASAP!).
Finally, the third survivor can focus on a single skill: junk collecting. Collecting junk is something that you will have to constantly do and I never ever had the chance to have my junk collector do anything but this (and spend a ton of time getting healed).
Following this simple setup, you will have an easier life collecting resources, making it easier for you to change tasks and focus on a particular resource if the situation requires it.
Deal with hunger first, health second
Later on in the game, you will basically have to heal your survivors after every run to the junk mine, making micromanagement a lot more important. However, if the weather is right, you might be able to pull out two visits to collect resources without having to heal.
If both stats are low (health and hunger), you should start replenishing your survivor’s hunger first, then deal with the health. There are two reasons for this: hunger always goes down at the same rate (while health goes down faster if it’s too cold outside) and second because health will still drop a bit even when your survivor is eating. So, in order to optimize your times – eat first, heal second!

Don’t forget to charge up that battery!
Although not extremely important in the long run, the battery can be a life saver in many situations and it usually requires very little time in order to be fully charged up.
So upgrade it to offer around 15 hours of power if your generator breaks and try to keep that battery full at all times in order to make sure that a sudden drop of power won’t ruin your entire base.
You don’t have to rush to repair all structures
Although most structures inside your base have to be repaired as soon as possible (like the radiators or the stove), the others are not really a priority unless you really need to use them.
The least important item around is the Weather Beacon or whatever it is called. Knowing the weather is indeed good as it allows you to plan a bit ahead, you will still be able to do your thing even if that’s broken. I spend most of my day with that item broken and I only repair it when I have a ton of junk saved up. This way, if anything really important breaks up, you still have the junk to repair it!
Send two survivors to collect one resource (when distance becomes a problem)
As you progress through the game, it will become more and more difficult to have a lot of these two resources: wood and junk, mainly because your survivor will have to travel farther and farther to get them.
This is why your multitasking survivors that we’ve talked about earlier will come in handy: you will have to send two of them to collect one of the resources or the other. So always do this until you have a bit more than enough of that particular resource, then send them to do their regular thing.
Micromanaging your resources is the most important thing in the game, but it’s a skill that’s relatively easy to master if you pay attention to the resource needs (and you follow all my advice above).
Don’t upgrade anything above 80 capacity
Apart from the food which can be stocked up really fast, I don’t think that you will ever be able to have more than 80 of a particular resource. That’s why I don’t recommend upgrading any of the containers above this number, because the junk costs for these are way too high.
Also, don’t upgrade the battery for more than 15-16 hours, and the Weather Beacon to show you more than 3 days in advance. Keep that junk for repairs, because you’re going to need them a lot!
You can watch ads (or spend money) for extra resources
If things get really tough and even a single resource would make the difference between life or death, you can always watch an ad too get that particular resource: just tap it to see the available options!
But if you have some extra gems laying around, you can get an even better deal: 5 resources for a single gem. So have this in mind in case things get really difficult and you really need a bit of a boost!
This would be everything that we have for you in terms of strategy for this game. Do you have any additional Symmetry tips and tricks to share with us? Let us know by commenting below!


Published: Nov 27, 2018 04:26 pm