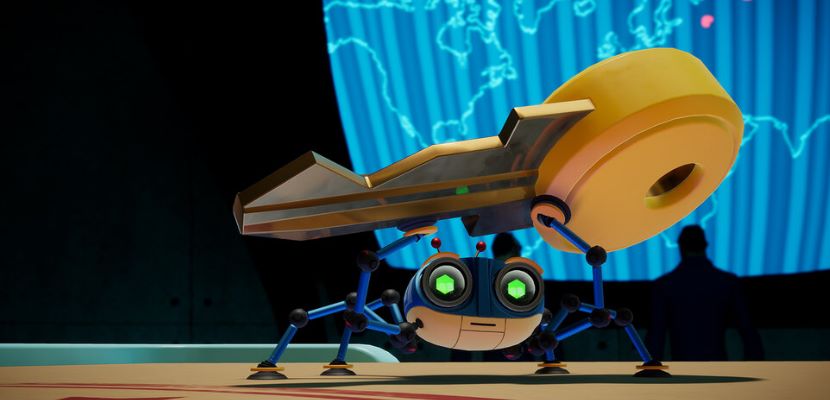
Save the world as a tiny robotic spider in Spyder, a 3D adventure game where Spyder is sent around the world to stop the nefarious S.I.N group from taking over the world! Crawl anywhere you like, utilize awesome spy gadgets to help you get around and manipulate objects, and solve various logic puzzles to save the day!
In our Spyder walkthrough, we will guide you through the game’s six missions and give you puzzle solutions along the way. Let us jump right into it with our Spyder tips and cheats walkthrough to complete all missions!
Mission 1 – The War Room
This is considered Spyder’s tutorial level, so this one is not relatively long nor challenging. Still, there are a few parts to it that can get tricky, so let us get right into it. Your first objective is to move over to the launch documents on the desk, but you will see that they have been redacted. You will need to print out a new copy, but the printer is out of ink.
A new ink cartridge can be found on top of the shelf to the left of the printer. Once you print the new copy, walk across the printer’s now open tray to get to the other side. A security camera is covering the computer in front, so climb up to the top of the computer to pass safely. When you get to the gap in the desk, you can use Spyder’s grappling hook on the yellow handle to get across.
Note that most objects that can be interacted with one of Spyder’s tools are usually highlighted yellow with a noticeable glow to them.
Now, you need to open the security box that has two locks on it. The first key can be found in a gray box at the end of the table, while the second key can be found hanging by a key ring at the top of the rightmost shelf. Inside the security box is a fingerprint – grab it and climb up to the top of the leftmost shelf. You should be in range to grapple over to the yellow thermos.
Take the fingerprint to the computer terminal to scan it, which shuts down the camera system. Climb up to the top and enter the mainframe system. Be careful when crossing the belts, as you can get crushed by the wheels on the side. The path is straightforward, and at the end you will need to play a “simon says” minigame with the terminal.
Once you get back to the computer, you will need to use the trackball to move the mouse and abort the launch. The firewall tries to activate it, but you must prevent it from doing so. Move the white block around by moving the track ball. Your objective is to block six yellow missiles, but if you let three through, the game is over. Once you successfully get through the firewall, the mission is complete.
Mission 2 – Sky High Spy
To disengage the wheel safety lock, you need to find the yellow locks located around the objective marker. You can pull them out to unlock the first set, then look for the big yellow cog on one of the red wheels. You can unlock it, then you can finally pull the main yellow lock on the big pipe to disengage the safety lock.
To drop the wheels, you will need to stop the steam coming from the pipes. On the underside of the pipes, there is a yellow button you can hit to stop the steam. Once you get to the hydraulic control, pull the yellow switch to open the cover, then rotate the yellow dial to drop the wheel.
To get to the engine room, crawl on the ceiling and find the yellow slide latch to open path onto a pipe. Cross the pipe making sure not to touch any of the steam that is spraying out. Once you are in the engine room, you will need to carefully cross the engine making sure to avoid the wind pressure. Once you get to the other side, you will be sucked into a pipe and spat out the other end.
Pull the yellow switch to slow down the conveyor belt. Unscrew the latch to drain the oil supply, then drag the empty latch over to the pipe to block the vent from opening. Pull the yellow switch to slow down the belt, and make your way up the pipe. Once you are back at the engine, you will need to twist the orange knobs to stop the steam from coming out.
Once you are inside the engine, you must be careful – the blades are spinning out of control, so wait until they slow down then proceed quickly. You will need to flood the engine with coolant to stop it, so head to the top of the core piece to twist open the lid. Climb up to find the another lid directly above you, then laser it open to release the coolant.
At the back end of the bomb, there is a yellow screw that lets you open the hatch. You must rotate the yellow disc enough so that the left bar fills up. However, do not spin it too fast as that will cause it to explode. If the gauge on the right is in the dashed red zone, stop spinning immediately. Once you fill the left gauge, the bomb will drop.
Quickly move forward to the yellow hatch to open the bomb’s core. You will see two symbols on the left and right, with two dials. Grab the corresponding dials and turn them so that they match the symbol on the same side, which allows you to push the red and yellow cores up. Once both cores are in, step on the yellow switch and the mission is completed!
Mission 3 – Space Invaded
You will see yellow pipe pieces floating around. You have to grab them with your grapple hook and put them back inside the ruptured pipes to restore the flow of fuel. Certain pieces fit in different spots, so make sure you check the positioning of the pipe pieces. You will have to use a + shaped piece on the top of the fuel tank to finish connecting.
The main line will rupture, so you will need to replace all the pieces back in to create a bridge across the tank, which will allow you to escape the fuselage section. Once you are outside the ship, you will need to align the thrusters, which is done by rotating the dials until they are in the green zone. Once both thrusters are in the green, pull the yellow switch at the bottom.
Grapple between the debris to get back to the ship. Crawl around until you get to the backside which houses the electrical subsystem. You will need to drag the green node at the top through all of the notches with the green indents while avoiding the ones with the red indents. Drop the node inside the hole with the two green blips.
A new node will pop up, this time a red one. You know what to do here! After you complete it, a bigger subsystem will power up – this is the life support system. The rules are the same here, though the grid is much bigger. Just take your time and plan your route out and you should be fine.
To secure the hatch, you must pull the yellow handle at the top, at which point you will see the safety lock in jammed on the bottom – laser it off to close the hatch, then spin the dial to lock it.
Crawl down to find the sabotage device where you must play another game of “simon says”. Then, you must align the guidance system using a trackpad just like you did in mission 1. The computer will display a map with a yellow square somewhere, and you must place the targeting reticle over the crosshair before you run out of time.
You will need to deploy the parachutes to manually slow down re-entry. Crawl over to the right and pull the yellow level to determine which meter will be spun. Spin the dial to set both meters in the green, push the yellow button and the mission is completed!
Mission 4 – In Too Deep
To unlock the vault, you will need to find the fingerprint ID. There are little paper sticky notes around the passcode entry that give you pieces of the code if you want to find it for yourself. Otherwise, the passcode to the vault is Triangle 1 – Square 2 – Hexagon 3. Inside the vault is the fingerprint ID, so grab it and take it to the cockpit door’s fingerprint scanner.
Make your way to the computer and scan to begin takeover of the submarine. To send data packets, you need to match the connection by moving the trackball around until the wavelengths match. You have a minute to do all five entries, so be quick!
Spin the dial until you see the cassette tape show up. Pull it out, then put it into the tape player, then play the “simon says” minigame to boot it up. The tape will fry and the sub will start to flood, and you need to find a way into the engine room. Carefully make your way across the seats to find an orange you can roll on, which will let you cross the water safely.
To connect the batteries, you will need to spin them so that the copper prongs are touching the copper bases. You must do this for all five batteries: the bottom left one points up, the bottom middle points left, the middle points right, the middle right points up, and the top middle points left.
Cross the pipes and recover the yellow knob then place it back on the pipe to increase engine pressure. There are three yellow knobs and you must turn them all to blow out the engine. Make your way back to the submarine cockpit and the mission is completed!
Mission 5 – Off The Rails
Once you pull the brake level, you will need to head over to the computer terminal. This time, you will need to find two keys to unlock the terminal and activate the breaks. One key is sitting on a notepad on top of the terminal, so grab it and place it in one of the side terminals. The other key is again on top of the dashboard but on the left side of the room.
You will need to override the system to activate the brakes. Attempt to, and you will find out something is jamming the brakes. Head inside the compartment and work your way down the cables. Once you are below the train, you will find C4 strapped to the brakes. Avoid the oil and make your way to the C4.
To disable the C4, you must cut the yellow wire that is connect to the red core of the bomb. For the first bomb, this is the bottom wire. For the second bomb, it is the top wire. For the final bomb, it is the right wire.
When all bombs are deactivated, you can destroy the remote device itself, so cut through the grate and head over to it. You will need to play another “simon says” game, at which point a device emitting poison gas will begin to flood the cabin. There are three fans in the cabin – to vent out the air, you must pull the switch all the way up and spin the dial until the vent opens.
One of the vent’s switches will be missing – the piece is on the under desk in front of the terminal. Two vents are on the sides of the terminal, and the final vent is underneath. Take the gum off to unjam the vent. Head back to the vent control to play the simon says game to activate the vents.
The compartment with the canister will open, so head inside and turn the yellow dial all the way until the gas disperses. Head back to the terminal to activate the brakes – simply keep the white arrows within the yellow block and the mission is completed.
Mission 6 – Bugged Out
The path to the satellite antenna is fairly straight forward, but it is absolutely littered with obstacles and hazards. Make your way carefully and slowly towards the center to reach the antenna. There is a yellow lever that can be pulled to open the sides of the antenna.
Head inside and climb to the top of the antenna and spin the dial counter clockwise. Head back down and now you can climb down the internal shaft of the antenna. To restore power, you must move all the fuses into their opposite positions, which allows the blue fuse to go into the middle slot.
To destroy the fans, pick up any of the loose screws that are now around you and toss them into the fan. There are more fans higher up, so grab screws and start climbing. At the very top, you will need to spin a dial to connect the wires, creating a bridge for you to cross.
Now that the computer is overheating, you can deploy the solar array. Climb up and head out the now opened side vent to find the solar array dial. Spin it all the way, then climb onto the array. You need to make it all the way to end, and note that some of the panels flip – you will need to go to the underside of the array to continue forward. You will have to cross multiple arrays to get to the disable switch.
Once you get to the final array, you will need to web splat multiple switches to completely disable the array. Now you need to head to the booster section – take the yellow slide to drop yourself down to the thrusters. You will need to cross the intersection where the thrusters are firing, so time it well to avoid damage.
Once you spin the dial, the thrusters will shut off. Head inside the grate opening to hack the computer, but first it must be calibrated. You will need to drag the fuses around once more passing through the same colored gates, but this time around there are three different fuses. Green fuse will go in the top right socket, blue fuse goes in the top left, and red goes in the bottom right.
Head back to the terminal and play “simon says” to initiate the launch. Quickly climb out the top of the satellite and the final mission is completed!
Congratulations! You have completed Spyder. Now, you can go back and collect the fun hidden stickers if you would like.


Published: May 21, 2020 03:59 am