Welcome to the tastiest and fizziest dungeon crawling experience ever! The bubbly dungeon is back in Soda Dungeon 2! The same addictive dungeon crawling is still here, and you are still in charge of building a fine town from the ground up with plenty of different soda flavors to go around. Soda Dungeon 2 is also packing some new gameplay features as well!
In Touch Tap Play’s Soda Dungeon 2 tips and tricks guide, we will go over the basics of running your little town and soda tavern. We will help you get through the Dark Lord’s castle as efficiently as possible, so let’s get started with our Soda Dungeon 2 cheats, tips, and tricks strategy guide to reach the Dark Lord!
Building your Soda Party
As you learn in the tutorial, the core gameplay loop of Soda Dungeon 2 is to go to the soda tavern, recruit heroes and build a respectable party, then send them off to explore the Dark Lord’s castle.
When you first start the game, you will only have access to the Soda Junkie hero. These guys cannot get enough soda, so you will always see them at the tavern. They cost nothing to recruit, but for good reason – their stats are very low and they should only be used when there is no other choice.
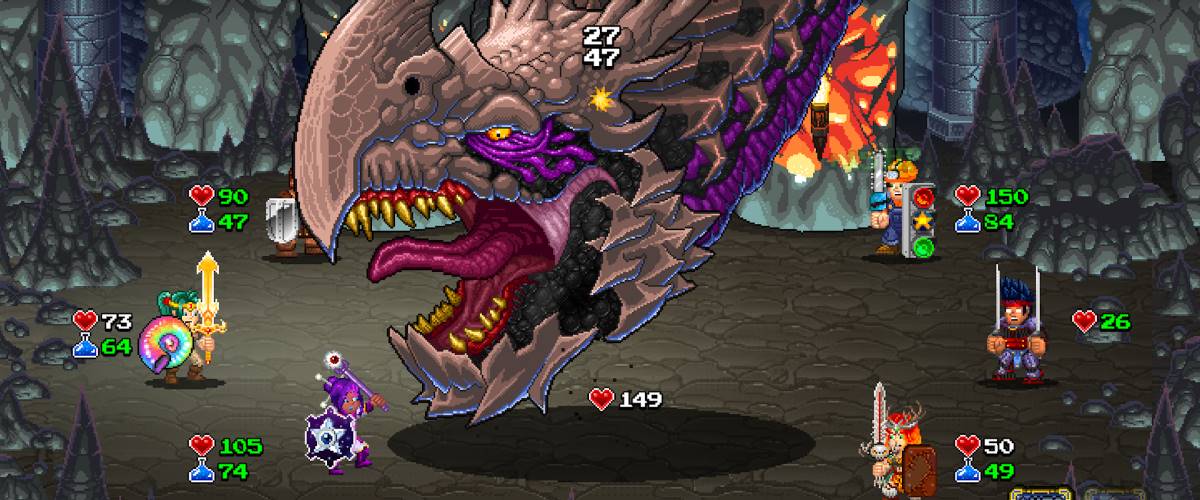
Once you get enough gold, you can start unlocking new flavors of soda, which will attract different types of heroes. Each hero has different stats and skills that give them an edge in battle. When you tap on a hero, you will see their three base stats and any skills they might have, plus their recruitment fee.
The heart is maximum health, the sword is attack power, and the swirly blue icon is maximum mana. You can tap on the skill icons to get a detailed look at what each skill does.
Here’s a small tip: if you have auto-equip enabled, the first hero you recruit will be equipped with the best gear you have. For an easy time, try to recruit stronger heroes first for a smoother time.
(This Soda Dungeon 2 guide was published first on Touch Tap Play)
Choosing Different Classes
You will be doing your first couple of runs through the castle with only Soda Junkies, but that is okay – you will be earning more gold that you can use to unlock new classes.
Before you start buying sodas, make sure that you buy a few more stools and tables. The more of these you have, the more your tavern will be populated when you come back from a run. They get progressively more expensive as you buy them, so only buy what you can afford.
Once you have a decent amount of space in the tavern – let’s say about five stools and four tables – you should start buying the sodas to unlock new classes.
You should buy Quarry Quench and RN Cola as soon as possible, as these drinks unlock the Miner and Nurse respectively, two important heroes to have early on in the game.
The Miner has great stats, but the most important thing is that he has an increased chance to find ore and mine shafts. You will need lots and lots of ore to craft stronger equipment early on.
The Nurse has lower attack power, but she makes up for it with her 30-point mana pool. Her First Aid skill allows her to fully heal a hero at the cost of 3 MP, but you can also equip her with a Heal Stone to maximize her MP usage.
To get past level 40+, you will need to start incorporating more Miners, Carpenters, and Nurses into your party.
Refresh the Tavern
If your tavern selection is not looking too promising, you can cycle out the heroes in the tavern by resting. This option is only available if you purchased the Bed tavern upgrade.
If you do not have the Bed purchased yet, you can always do it the free way. Hire a bunch of Soda Junkies, and then head into the castle. Let them see how far they can get or let them go into the castle naked for hilarity and a very fast run.
Do not be afraid to do this, as it is always important to head into the castle with a full party. The reason being is that back attacks are very strong, and with a full party you are guaranteed at least three back attacks per turn.
Taking Alternate Paths
As you progress through the castle, you will eventually come across mysterious portals. These are alternate paths that can take you to special event rooms, such as warps that propel you ahead a few levels, giant fairies that can sometimes help (or harm!) you, and more.
Early on, you will want to take as many of these paths as possible, as the positives outweigh the negatives. You will come across many treasure rooms, and if you have a Miner in your party you will also find mine shafts, which can net you a ton of ore.
One of the negatives you may come across is the “helpful” fairy. She will attempt to help you by casting a spell, but most of the time she will end up inflicting a random status ailment upon your party.
If you would rather not deal with alternate paths, you can always stick to the regular path which has no random events. You can even set your auto-play conditions to make it so that you can always use keys for healing fairies, which is recommended, and you can also set it to ignore alternate paths when you have no keys.
Craft for More Power
You will find plenty of gear as you progress through the castle, though none of the gear you find will be as powerful as the stuff that you can craft.
As such, whenever you feel like you are just not strong enough, crafting new gear for your heroes is always the best move to make. Before you start looking at gear, make sure to go to the material list and convert your raw materials into usable ones, like iron ore to iron ingots.
This is a good time to mention that each piece of gear might have special effects. You can tell if there are any effects on a weapon by looking at the info panel.
While it is usually better to equip gear with the highest stats on it, sometimes you may want the special effects from a weapon or armor that has lower stats.
Utilize Heal Stones
One accessory that is extremely useful early on is the Heal Stone. When a party member has a Heal Stone equipped, they gain access to a 20 HP heal that only costs a mere 1 MP.
The Heal Stone healing will pretty much be your most efficient source of healing for a while, even beating out the Nurse’s heal skill. While the Nurse can fully heal, her skill costs 3 MP and you will not even have party members that have more than 20 max HP for a while.
Once you start crafting the better accessories like the Iron Ring that give substantial stat boosts, then you can start leaving behind the Heal Stones.
Start Earlier for More Loot and Gold
If you are trying to farm up gold or get some rare materials for crafting, you may want to start earlier in the castle than later. Once your party is strong enough, they can be left alone from the beginning of the castle and they will make it pretty far.
If you are farming for items, we definitely recommend buying the Loot Beer from the tavern, which unlocks the Thief class. Thieves can steal from enemies, and they also have a neat passive skill that allows them to open all three treasure chests in a treasure room. Very helpful!
Entering a New Dimension
After you conquer the Dark Lord, you are given the option to enter the next dimension. This is basically an “ascension” mechanic – you will move onto the next part of the game but you will lose gold, unlocked sodas, and items. You will keep important upgrades and resources though, like buildings and premium currencies.
Before you move onto the next dimension, we recommend selling your entire inventory and use the gold on any potential upgrades to your buildings.
Once you are ready, you will be asked to choose a relic as you head into the next dimension. Relics are powerful items that provide your party with a permanent buff that carry over between dimensions.
There are all sorts of relics and what you choose is ultimately up to you, but we have some recommendations if you are lost. If you do not know where to start, the Relic of Attack and Relic of Health are great choices. No matter how you like to build your party, these two relics are always optimal choices.
That’s all for Soda Dungeon 2! If you have any other tips or tricks to share, let us know in the comments below!


Published: Jul 15, 2020 12:24 am