Project Zomboid is a brutally realistic zombie survival game where the odds are stacked against you. You can enjoy the game solo or with friends in an online hosted server. If you’re hosting a server, you can access an admin panel that can edit the game world in all sorts of ways. Today, we’ll show you how to access the Project Zomboid build 41 multiplayer admin panel!
How to Use the Project Zomboid Build 41 Multiplayer Admin Panel
Before we begin, ensure that your game is up-to-date with all the latest patches. Build 41 is the latest version of Project Zomboid, so whether you’re playing the Steam or GOG version, you’ll need to update in order to do the next steps.
Load up Project Zomboid. Begin hosting your server—it doesn’t matter if it’s an existing world or a new one. Once you’re loaded into the game, press the enter key on your keyboard to begin typing into the chat box. Delete the /say, then type the following command:
- /setaccesslevel USERNAME admin
Replace the USERNAME with your Steam username. For example, if your Steam username is TouchTapPlay, the command would look like /setaccesslevel TouchTapPlay admin. If your username contains any uncommon characters, you may want to get rid of them for this process.
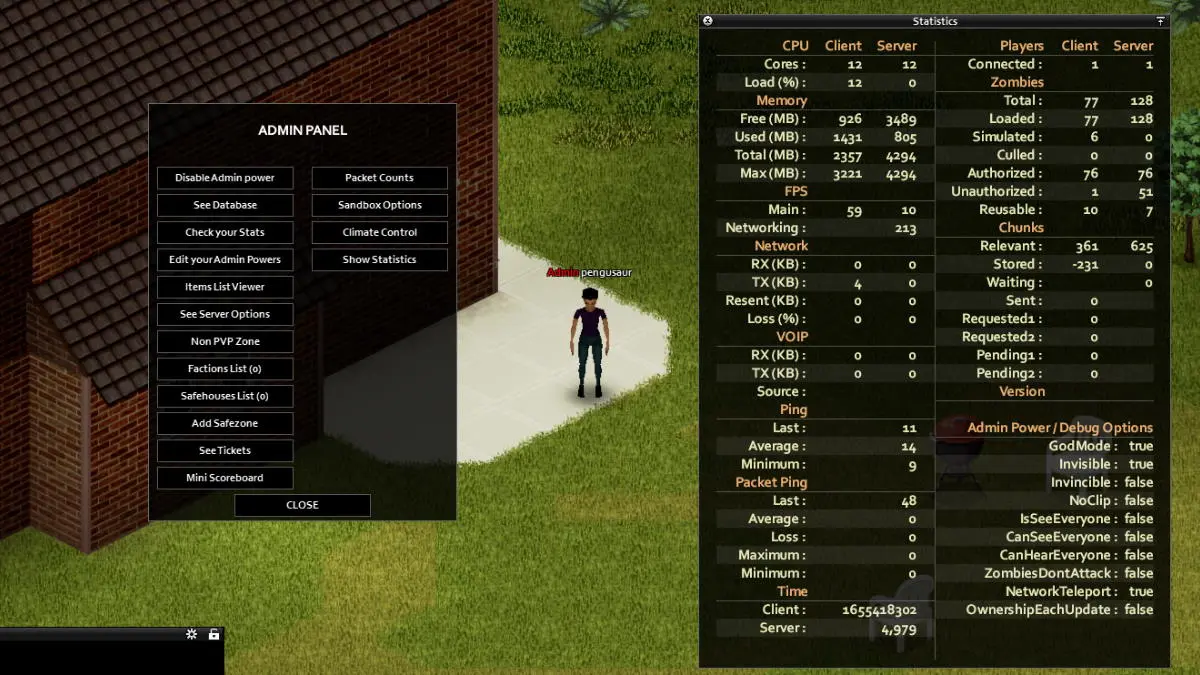
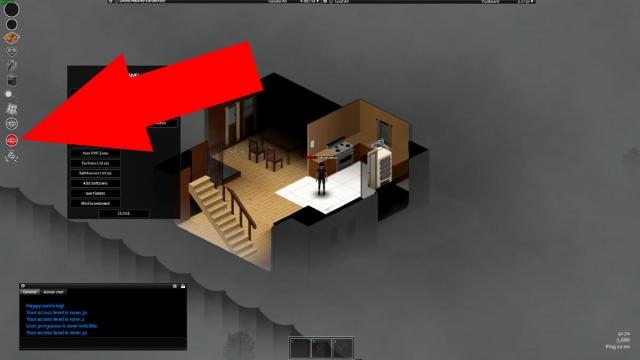
If you did it right, you should now see an ADMIN button appear on the left side of the screen, below all of your other menu buttons. Click on it to bring up the multiplayer admin panel, where you can control all sorts of things. You can spawn in items, teleport to players, set safe zones, ban players, and more.
Related | How to Dry Clothes in Project Zomboid
The process is slightly different if you’re hosting a dedicated server. All you need to do is input the same command into the dedicated server console, no forward slash necessary, and it should work. Have the game running in the background so that you can verify if the command worked.
Having admin control is essential if you plan on running a large-scale multiplayer server with lots of players. You can also just use it to cheat the game and make yourself invincible too! There are lots of things you can do with the multiplayer admin panel, so experiment with it and see what you find.
If at any point you want to revoke your admin privileges, you can do so by accessing the admin panel and clicking on the Disable Admin Power button. You can always give admin power back to yourself by typing in the command again.
That concludes our guide on accessing the multiplayer admin panel in build 41 of Project Zomboid. If you have any other questions regarding multiplayer in the game, feel free to drop a comment below.


Published: Jun 16, 2022 06:16 pm