
Assemble With Care is a unique new game that tells the story of a young repair woman who travels the world helping people who need their goods fixed. As Maria, players will use their trusty screwdriver to dismantle every day items and get to the root of the problem.
In our Assemble With Care walkthrough, we will guide you through all 13 chapters of the game with step-by-step instructions to fix all the items. Let’s get started with our Assemble With Care complete walkthrough for all chapters!
1. Arrival
This is the beginning of Maria’s magnificent journey. This one serves as an introduction, so there are no complicated stuff to work out here.
Just unpack all of Maria’s stuff from the suitcase into their respective silhouettes. You can spin stuff around to get a closer look – you will be doing this a lot on Maria’s travels.
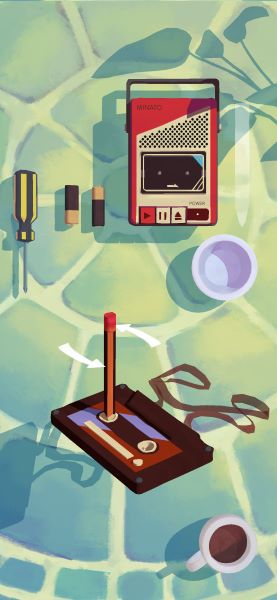
2. Lullaby
Examine the cassette tape, and you will see its reel all tangled and loose. Drag the pencil over it to wind the reel back in. Examine the cassette player and notice it does not have any power.
Flip it on its back and use the screwdriver to unscrew the back panel. Take out the depleted batteries and replace them with fresh ones, then put the screw back on and screw it in place. Flip it back over and press the eject button to open the tray. Slide the cassette tape in and play it.
3. Shattered
This one is easy and serves as an introduction to the glue mechanic. You need to put together a statue that has been shattered into a bunch of pieces. It should be pretty easy to figure out what pieces go where as it broke with the arms and legs still intact.
To glue a piece, rotate the piece until you see a surface with moving lines through it – that signifies a surface that can be glued. Glue the entire statue and it will look no worse for wear!
4. Disconnected
Flip the rotary phone over, and unscrew the four screws holding the plate. You will immediately notice the left ringer is cracked, so go ahead and unscrew so you can replace it with your new one.
Unscrew the main chamber to reveal the circuit board. The current board is fried, so drag the wire on it to your toolbox to disconnect it. Remove the board and replace with your fresh one, then connect the wires making sure to match the icons.
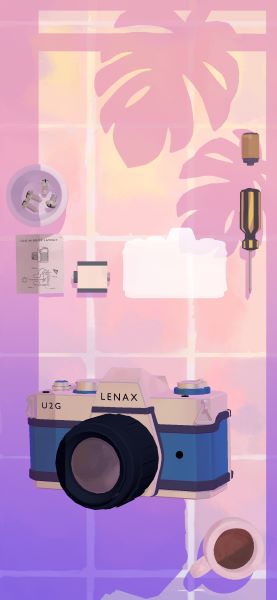
5. In Focus
Remove the front panel, back panel, lens, and top panel. The inner mirror of the camera is severely cracked, so replace it with your new one. There is a screw on the side of it – you need to use the screwdriver to adjust the angle of the mirror.
Angle it so that the light is coming out of the viewfinder. Put the new roll of film in the camera, then reassemble it.
6. In the Dark
Attach Carmen’s name and the ring to the front of the sign. Remove the back panel, glue the highlighted area, and stick on the power supply. Attach one wire, and hit the power button. It is not enough for Carmen though, so she asks for something more flashy.
Glue the area and attach your new board piece, which will enable the sign to flash. Wire so that all panels are flashing, then try powering it on again. It still is not enough, so Carmen will let you pick out another piece to add to the sign.
You will get another board, so glue it on and choose your favorite sign. You will need to add another wire in, then pack it all up and you are done!
7. Playing Up
No screws to deal with here, so remove the top back panel. There is lots of wiring in here, so disconnect all three wires. No need to move them to the toolbox, just disconnect.
Both the sound board and the screen are broken, so remove the entire board. Install the new screen, then put the new sound board on it – the one with the red circle on it.
Remove the bottom back panel. The sound board on this is fried as well, so remove that and the circuit board. Replace the cracked A button and put the circuit board back in with the new sound board installed.
Now, you need to wire the whole thing. The wires can go anywhere as long as they match the icons. For example, if the wire on the top panel is plugged into music, then its connecting wire on the bottom panel must also be plugged into music. Reassemble, put the game cartridge in, and voila.
8. Momentary
Remove the watch from the wrist clasp. Unscrew the back panel and remove the broken plate with the cogs. Some of the cogs are still stuck on the fragments, so go ahead and take those off.
First, place the golden cog with the sharp-looking edges in the bottom right spot. The small golden cog goes in the bottom middle spot, the medium golden cog goes in the bottom left spot, and the big silver cog goes in the top left spot.
Finally, the small silver cog goes right in the center. Flip the plate over and place the big silver cog with the hole in the center here.
Examine the watch face. Unscrew and remove the broken glass, take out the watch face, and then place the new glass in. Screw back in, put the center plate back in, then reassemble.
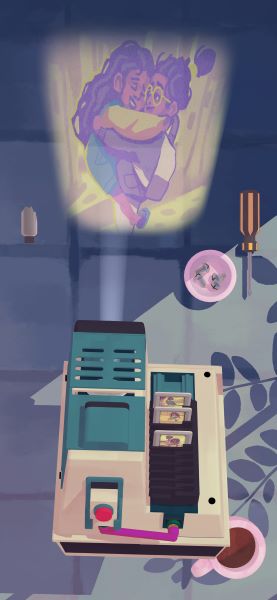
9. The Bigger Picture
Unscrew and remove the top slide holder and the base. Replace the cracked bulb, then install two mirrors; you will need to angle them so that the light bounces upward through the projection lens.
Place the base back on, then install the last mirror near the stuck slide, then angle it to redirect the light. Helena will give you additional slides and the clicker, so place all of the slides in the tray. Place the clicker in the slot and connect it with a wire, then tap the red button.
10. Boiling Point
Assemble the boiler by attaching all of the parts. It is pretty straightforward, but if you need instructions there is a sheet with a diagram of the completed boiler. Flip the knob on the side to start the gas, then light a match and start the fire.
Place the pot on the boiler and pour the broth in. You need to follow Carmen’s ingredient list as best as possible. What we made out was:
- 1 pint of stock
- 1/4 stick of butter
- Half a carrot
- 2 broccoli florets
- 3 chopped tomatoes
- 3 wild mushrooms
- Plenty of love!
It actually does not matter what you put in the soup, so go ahead and use whatever you like.
11. Harmony
Remove the cover and attempt to play. The speaker sounds all fuzzy, so open the whole thing up. Change the wiring around so that the icons match, and reconnect the belt to the knob port on the left side. Try to play the record, and you will discover the motor is rotating the wrong way.
You will get replacement parts. Remove the rubber band and wire, the take out the yellow motor and attach the gray motor. Play the record and adjust the playback speed and volume so it sounds right.
12. A Father’s Reprise
Pull out the blue box at the bottom of the music box. Open it up and unscrew the picture. Joseph will give you a family picture to replace it with, so go ahead and glue it on and reassemble the ring.
Flip the music box over and unscrew the bottom panel. This will let you pop the lid off and remove the actual music box. The gear and the music box roller are broken, so remove those.
Put the golden cog in the spot closest to the keyhole, then put the big silver cog next to it, with the small silver cog last. Put in the new roller and put the rolling cog back in.
Take a look at the box your removed earlier and you will find a bird figure. Place the figure in the slot of the lid, and the music box is complete. Reassemble and put the key in to play it.
13. Depature
This one is not really a level but more of a recap of Maria’s travels. Pack her suitcase and she will reminisce about all of the people she has met. Congratulations, you have finished Assemble With Care!


Published: Jan 8, 2020 02:36 pm