After a catastrophic event, Amelia Cho finds herself stranded in an unknown galaxy. With only her trusty ship and her talkative AI partner Matey, she must navigate her way through a hostile galaxy in No Way Home, a space shooter from SMG Studio. With challenging space battles to fight and a mystery that spans the entire universe, there is a lot to dig into!
Our No Way Home tips and tricks guide will show you the basics of survival in this harsh galaxy. We will give you some pointers on space combat, finding all of the cores, and completing the main story missions. Let’s jump right into our No Way Home cheats, tips and tricks strategy guide to finding your way home!
Piloting Basics
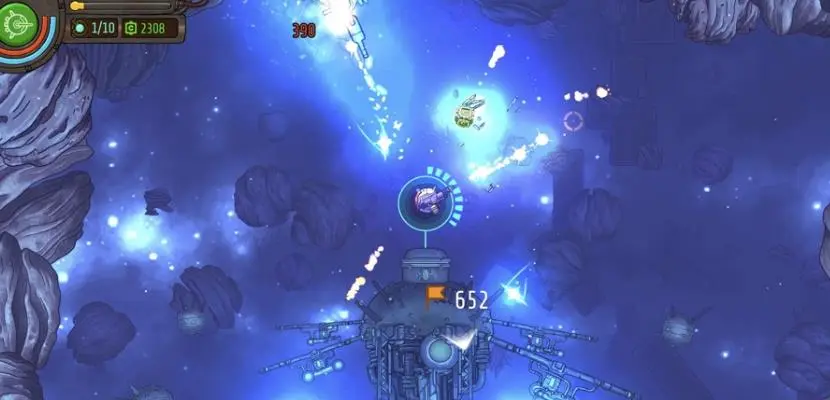
As you navigate the treacherous layout of the various sectors, here are some basic tips to help improve your odds of survival. First off, always use the environment to your advantage. Starting out, your shield is very weak and it can only take a few hits before it goes down.
Move behind cover to take the heat off of yourself, and give yourself a few seconds to recuperate. After a little while has passed, your shield will regenerate automatically. If you take any damage while your shield is down, your hull will be damaged, and that must be repaired manually with either health kits or the workshop.
Keep an eye on your heat gauge as well. As you fire your gun, heat will build up in your ship and the game will warn you if you get close to overheating. If you continue to fire, your ship will overheat and your shields will start depleting very quickly, and your weapon’s rate of fire will be drastically slowed.
Overheating in the middle of a firefight can mean doom, so pay attention to your heat. Keep an eye out for ice rocks – they are pretty common, and they come in varying sizes. They are easily distinguished by their light blue color. If your ship touches an ice rock, your weapon temperatures will drop down very quickly, allowing for faster firing.
Do not forget about your claw! Your can shoot the claw at any piece of free floating debris or enemies! You can hold quick enemies in place while you finish them off, or you can use big rocks as portable cover, and you can even slam enemies around with it. You can even drag an ice rock behind you to use it as a portable cooling station. The claw is a very versatile tool, so do not write it off!
Follow the Missions
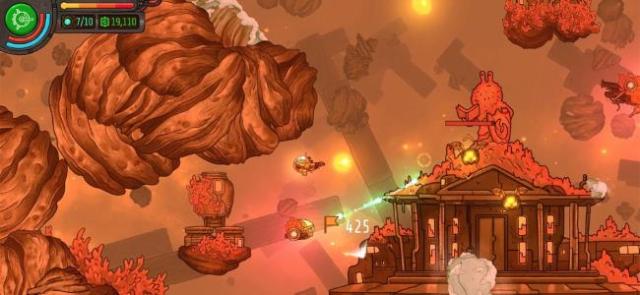
The galaxy Cho found herself stranded in is not very friendly, as it happens to be filled with tons of space pirates of different factions. There are also plenty of dangerous fauna, so even nature is out to get her. The odds are against you, but eventually you will find some helpful faces.
Bars are the first place you should go if you are ever lost. You can chat with the local aliens, and they will often times have leads on new jobs, or they will give a job themselves outright. These will turn into missions and they will lead you down the general progression route.
Since the game is procedurally generated, your universe will not be the same as ours. As such, you have to rely on the missions to guide you. When you come across the main story missions – the mysterious Domes – all ten Domes will appear on your star map. Follow the missions, and they will take you to the same sectors that domes are in, and completing them rewards you with helpful currencies and items to power up your ship.
Outfitting Your Ship
When you first get to Hylga’s workship, her appearance might be a little… unusual, but rest assured she has the best workshop in all of the galaxy. The workshop is where you will put all of that scrap you have gathered out in the wild to good use. You can craft new parts for your ship here, and we will explain the basics.
Your ship has five core components: weapon, shield, reactor, hull plating, and support. Your weapon is, well, your gun! Shield is what protects you from threats before things actually start damaging your hull. Reactor determines your ship’s overall strength (more on that below). Hull plating is your red health bar, and support grants passive bonuses.
Reactor
The most important part is your reactor. The ship’s reactor determines its “load”, heat, speed, and cooling. Load is basically your ship’s energy budget – every other component comes with a load number attached to it, and you cannot exceed your reactor’s maximum load, forcing you to choose your components wisely.
The reactor’s heat level is how much heat it can store from your weapons. The higher heat you have, the more you can fire your weapons before you start overheating. Speed is how fast the ship can move. Finally, cooling is how fast your ship cools down after you stop firing your weapons.
Shield
Your ship’s shield component will generate a protective force field around it as long as it is powered. Taking hits will make it lose power, and enough hits will drop the shield entirely, but it will regenerate on its own after a little bit. It is best to avoid combat when your shield goes down, unless you are confident in your dodging skills.
Shields have three stats: load, strength and regen. A shield’s strength determines how many hits it can take before it goes down, and the regen shows how quickly your shield will start to regenerate. The higher it is, the faster regen will kick in.
Hull Plating
The hull is your ship’s exterior chassis, and the last line of defense after your shield goes down. Hull plating only has one stat and one state alone, and that is hull. The higher your hull stat is, the more health your ship has. Upgrade this alongside your shield to ensure you can take a beating and keep on fighting.
Support
Supports are mini components that grant passive bonuses to your ship. You can only have two of them equipped, but keep in mind that they have load just like all the other components, so you will still need to balance parts.
Support parts can do things like boost your hull, shield, speed, shield regen, and more. There are even support parts that power up Matey’s weapons, if you are looking for some extra firepower.
Choosing Your Weapons
Now, we have saved the best for last: the guns! Cho’s ship can only have one weapon equipped at a time, so you must choose wisely. Weapons can be broken down into two categories: their energy and shot types. They also have two stats: damage and heat generation.
Energy Types
Disruptor weapons are destructive weapons with no regard to anything else. These weapons are favored by the Pirates for obvious reasons, mainly because of their extreme damage output. Just be warned – these weapons get hot VERY fast! These weapons are suited for fast and aggressive playstyles, but make sure your ship is speedy and sturdy enough to pull it off!
Plasma weapons are run-of-the-mill weapons and the most commonly used weapon across the galaxy. Plasma weapons are well balanced with no obvious strengths or weaknesses either, with middle of the road damage and heat generation. Plasma weapons are good if you want reliable weapons!
Antimatter weapons are experimental weapons that are not fully understood yet. They are usually powerful, packing high damage and decent heat, but they sometimes have some kind of special mechanic to them. You will need to try them out to see if you like them!
Bio weapons use bio-organic chemicals to fuel them, and as a result they are not as lethal as the other energy types. However, they make up for it with the lowest heat generation of all the energy types – you should have no problem with heat when using a bio weapon. If you like to slowly pick your opponents apart from afar, consider trying a bio weapon!
Shot Types
Blaster is the most common shot type, and these weapons will unload with a consistent fire rate. Good for mobile ships, as you can move freely while laying on the heat on your enemies.
Shotgun types shoot out a wide cone of small pellets that quickly disperse over a large area. Weapons with this shot type are suited for close-range battles, as the more pellets hit your target, the more damage they will take.
Finding the Materials to Craft
Before you can make any of the things listed above, you will need the required materials to create them. You will find materials left behind destroyed ships, so make sure to look around after the carnage is over.
Need a certain material? You can tap on any material in the crafting list to gain a clue on where that material might drop. For example, Voltrinium Shards are a common part of void monsters and blessed swarmlings.
The game never explicitly tells you the names of enemies, and sometimes they may look a little similar so it is hard to discern the differences. In instances like this, it helps to create a mental note of what enemies drop what for the less obvious cases. Blessed swarmlings for example are pretty obvious, as they are bright blue and made of crystals just like the Voltrinium Shards are.
Fight the Dome Bosses
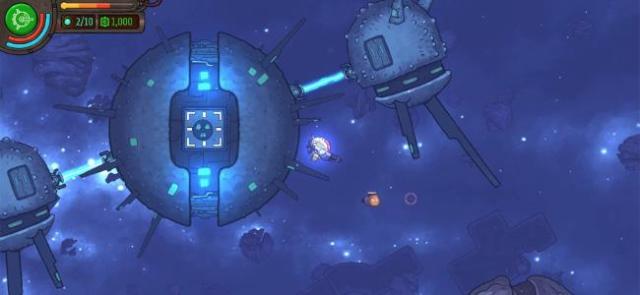
As you complete missions for the people you meet across the galaxy, you will also come across domes. Inside these ancient domes are gauntlets of powerful enemies, so prepare for the worst.
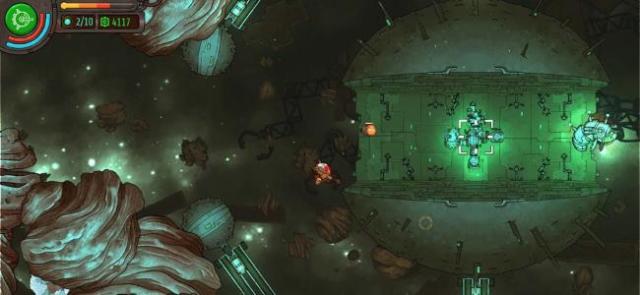
Upon entering a dome, you will start the first wave. Each dome has a certain number of waves, and you must survive all the way to the end. Fight like you mean it, because the domes are the game’s hardest challenges. There are ice chunks and health kits floating around the arenas, so make sure to use them.
When you get to the last wave, a giant boss will spawn, and it serves as the final challenge of the doom. Win the battle, and a bunch of precious loot is yours, including the dome orb, which is needed in order to help Cho get home.
Your star map lists the locations of all the sectors with domes in them, so do not worry about missing them. If you follow the main missions, they should take you near each dome. Keep working on it, and the end of the game is in sight!
That concludes our guide on No Way Home. If you have any other tips or tricks to share, let us know in the comments below!


Published: Apr 2, 2020 07:23 am