When two warring kingdoms clash, the drums of war echo throughout the land. When the twin prices of one kingdom and a fearless princess of the other meet in a fateful encounter, the story of Ardra begins…
War of the Visions FFBE is a new Final Fantasy game for the mobile platform. Set in same world as Final Fantasy Brave Exvius, War of the Visions focuses on a new story using gameplay similar to Final Fantasy Tactics.
As is the case with most Final Fantasy games, War of the Visions has a lot of complex systems going on. Whether you are familiar tactical RPGs or not, we will help you grasp the basics of War of the Visions. We will also help you master the combat system and build the team right for you in our War of the Visions FFBE tips and tricks strategy guide for beginners!
Movement and Positioning
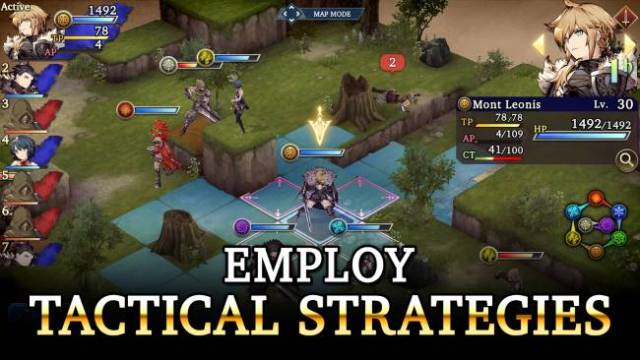
Every unit in War of the Visions has an agility stat, and this determines their placement in the turn order. The turn order can be seen at all times during a battle on the left side of the screen. The higher a unit’s agility, the sooner they will be able to act.
When it is a unit’s turn, you can move anywhere in the blue highlighted spaces. You can tap, or you can drag anywhere on the screen to move a unit manually. This is helpful during the more crowded battles when the screen can get cluttered and units are blocking your way.
One thing to note is that depending on how you play out your turn, your next action may come later than sooner. If you move and attack, your next turn will be delayed, but if you just move and end your turn, it will come faster. Keep this in mind as you are positioning your units.
We say this because positioning is key in this game. A unit in the right place at the right time can make all the difference. When you finish moving, you can choose what direction you want your unit to face. Any units that are attacked from the sides or back have a higher chance of getting hit, so you want to try to cover the way you think your enemies will try to flank you from.
And of course, there is height to consider as well. All tiles are elevated, and you can check your heigh by the number at the top right corner of the screen. Attacks and abilities have, in addition to their range limits, height limits as well. For example, a sword swing is not going to reach the guy on the cliff above you, even though you are in the tile next to him.
This is especially important for ranged units who use bows and guns and the like. The higher they are, the bigger their range is. A well-placed ranged unit on top of a perch can easily pick apart an entire group of enemies if left alone.

Attacking, Defending, and Resistances
When you are in range to attack, a bunch of stats will show up when you are prepping your assault. This screen shows a lot of helpful info, including your chance to hit, estimated damage, affected stats, and the elemental affinity tree.
The in-game tutorial will go over the basics of resistances, but we have to stress how important they are. Before you launch an attack, always make sure that you check resistances. If you target an enemy with a unit that can hit their weakness, you will see their health bar flash with the word “weak”.
Targeting low resistances on your enemies is the key to dispatching them in a timely manner. Attacking with no regard for elements and resistances will get you no where quick, so it pays to pay attention to the affinity tree and what types of weapons your units are using.
For particularly tough enemies, be sure to take advantage of chains. Attacking one after the other with multiple units will start chains, either physical or elemental depending on whether or not you use normal attacks or abilities.
Remember that there are five physical attack types and eight elemental types. Refer to the affinity chart before you commit to an attack. Conversely, you want to make sure that your vulnerable units are not out for enemies to hit their weaknesses.
If you are facing enemies that have the advantage over a few of your units, be sure not to leave them in the open to get hit by big attacks. Have your other units who preferably have a resistance to the enemy in question get their attention and take the hit.
For spell casters, you also need to take into consideration charge time. Each spell has its own charge time, and the higher it is, the longer the spell needs to take before it comes out. When you are targeting a unit to attack with a spell, you can aim to opt for the panel instead of the unit. This will make it do area damage, but should the enemy move before the spell comes out, it will miss them. Be careful about which option you choose!
Complete the Beginner’s Hall & Challenges
We have gone over the basics of combat and the most important things to remember, but if you ever want to brush up on training we recommend the Beginner’s Hall. It unlocks as soon as you start the game, and it will stay open until you complete all of it.
There are about 12 battles in it, and they are focused on teaching you different aspects of combat. When you complete a battle, you will earn some helpful items to help power up your team.
The most important part is that completing the entire hall will reward you with a few summon tickets that you can use to potentially summon better units, which is what we are mainly here for. Complete the Beginner’s Hall as soon as you can. It will disappear from the main menu once you do it, clearing up some of the clutter on the menu.
Do not forget about the Challenges either! These are also designed to help beginners out with all of the functions of the game. The challenges are presented to you on a bingo board, and completing certain challenges will reward you with special prizes. Completing the entire board will reward you with another summon ticket, again what we are after.
Start Building Your Team
Once you have all the tickets possible for beginners, head into the summoning menu and use them all. With the beginner tickets, you are guaranteed to summon MR (mega rare) units or better, and you even get one UR (ultra rare, the highest rarity) unit for free as well.
Now that you have a bunch of higher rarity units in your team, it is time to start building and balancing your team. You can bring a total of five units with you into battle, so you will need to ensure the team is balanced job-wise. Try to have a variety of jobs in your team, from frontline fighters like Lancers and Warriors to backline attackers like Black Mages, Archers, and the like. Do not forget a healing job like a White Mage!

Enhancing Your Team
Now this is where it gets a little messy. Strap in, there is a lot to cover!
Once you have chose your favorites, you will want to start enhancing them. You get a lot of EXP cubes for simply progressing through the main story, and you are going to want to use them. Your units gain a little bit of experience for participating in battle, but it is nowhere near the amount of they need in order to level up and grow stronger.
Your next priority should be to awaken. To do this you will need special awakening materials that can be found in the special daily dungeons, like the Alcryst Chambers. Awakening a unit will grant them another star, increasing their rarity, and up their maximum level and limit burst level. It will also unlock a new job for them at certain stars.
Then, you can actually level up the jobs themselves. Each unit can eventually unlock up to three pre-determined jobs, and they grant the unit access to abilities from different jobs. Leveling a job up requires special items that can also be found in the special daily dungeons.
Once you level up a job, the more portions of the Job Board will unlock allowing the unit to activate more nodes. You can get stat boost and new abilities on the Job Board. You can also enhance your existing abilities but you need Job Points (JP) to do so, which is earned from clearing battles.
Next step is to outfit your units with gear. Initially you will only be able to equip them with weapons, but you can unlock two additional pieces of gear. Units can only use certain types of weapons, and they each have proficiency.
Proficiency starts at E rank, which is the lowest. Every time the unit finishes a battle with that weapon equipped, their proficiency will improve. As proficiency grows higher, the unit will be able to take full advantage of the weapon, allowing them to deal more damage with it.
Espers and Vision Cards
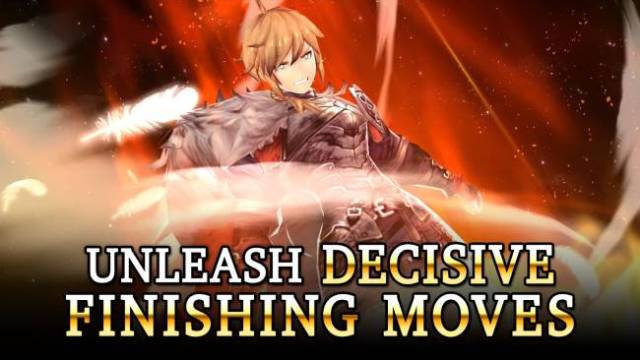
Espers are powerful summon creatures that grant the attached unit a stat boost and resistances. As you witnessed in the tutorial, Evocation Magic is extremely powerful and can turn the tides of battle provided it is used at the right time.
But the biggest thing is that Espers can further power up your units. They come with their own Training Board, which means you can hone their abilities as well. All of their stats and resistances go into the unit they are attached to, so take this into consideration when you are forming your team. To level up Espers, you need magicite which can be found from the Chocobo Expeditions.
Next are Vision Cards. They are basically mini Espers in the sense that they also bestow stat boosts upon their units, but they also provide them with special effects. These range from increased damage to increased resistances. Vision Cards also carry Party Abilities on them, and as the name suggests these bonuses apply to the entire team!
Using Espers and Vision Cards wisely can help you amplify your team’s strengths and mitigate their weaknesses, so be sure to choose carefully.
Gathering Resources
First and foremost, we highly recommend clearing the main story campaign as soon as you are able to. Not only does it unlock new functions of the game, but clearing the levels also rewards you with a bunch of valuable upgrade resources, provided you clear the star challenges.
From the campaign alone you will be able to perform a lot of awakenings, job level ups, and the like. If you need specific materials, head into the Farplane and check out the dungeons in the Events. The Day/Training dungeons are what you want – these dungeons focus on one specific material, and they are all materials you need for upgrading and awakening.
Some of the dungeons rotate out daily and can only be played three times a day, but most of them are open for repeat, so this is your go-to farming place. There are also dungeons for Esper materials, but you can also get them from the Chocobo Expeditions. Be sure to stay on that and send your units as much as possible!
And with that, you now know the core loop of War of the Visions. Fight through the story of Ardra, visit the event dungeons, and keep enhancing your units. We know there is plenty to this game left to discover, so if you have any other tips suitable for beginners, let us know in the comments below!







Published: Mar 27, 2020 10:09 am