Outlanders is a new village building/simulator game from the same minds that brought us Mars: Mars and Once Upon a Tower. Enjoy village life with a peaceful atmosphere, calming music, and simple graphics as you lead villages into prosperity and happiness.
Outlander is all about prioritizing and managing your villagers so that everyone is efficient and happy, so in our Outlanders tips and tricks guide, we will show you how to run your villager smartly. Let’s get started with our Outlanders cheats, tips and tricks strategy guide to building the best village!
Start with the island basics!
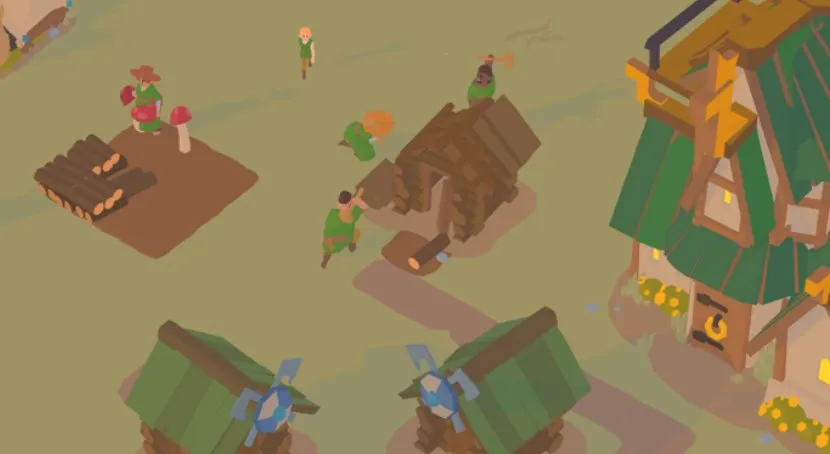
As you learned in the tutorial, the basic structures are the Forager’s Hut and the Lumberjack’s Base. These two structures are vital to your village’s survival, and they must be built as soon as the level starts.
The Forager’s Hut is your only source of food during the early stages of a level, and the Lumberjack’s Base is needed for lumber to build just about everything in the game, and you can process the lumber into planks which are required for the advanced structures.
Once you get a good system going, you can start planning towards the level objectives. You cannot get anywhere until you get a good footing!
Be efficient with your Forager’s Huts and Lumberjack’s Base!
When you are placing down either a Forgaer’s Hut or Lumberjack’s Base, you will see a highlighted area around the placement spot. This is essentially the structure’s “reach,” meaning that any relevant resource in it will be harvestable.
You can tell what resources will be in it as they are highlighted. When you are putting down your first sets of resource gathering structures, make sure that you try to put them in a spot where they can collect as many materials as possible.
Being efficient in the beginning of a level is the best way to start off, because remember that in order to destroy an old building and build a new one, you must dedicate builders to it and that can be disastrous during the late stages of a level.
Keep an eye on your villagers!
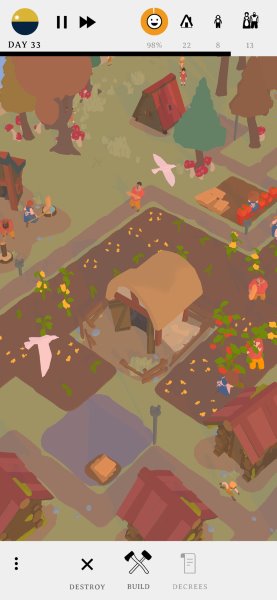
Villagers need food and shelter in order to thrive. You can tell how well they are doing by their general happiness at the top of the screen. The smiley face shows you how your villagers are doing, and happy villagers means more work done and higher chances for babies.
Villagers will eat periodically during the day, and this is why it is important to always have a good food buffer. If Villagers do not eat for several days, they will get hungry and start to slow down. They will eventually die if left unchecked, and overall happiness will drop significantly.
Having villagers pass in the middle of a level can have some cataclysmic effects, so it is important to keep an eye on your villagers. If a good portion of your villagers are hungry, divert more effort into Farms and Forager’s Huts.
Villagers also require houses to live in. Villagers can sleep outside if need be, but this prevents their happiness from increasing. Make sure to build houses as you need them to ensure that no one has to sleep outside.
Use Decrees to keep your villagers under control!
When you start level 3 “Big Trouble in Cookie Island,” you will gain access to Decrees. These will affect your villagers in certain good and bad ways, and they will last until you cancel them. However, you must wait three in-game days before you can cancel a decree.
Decrees can help certain aspects of your villagers under control if the situation arises. For example, one common problem a lot of players find themselves in are villagers that are TOO happy.
When villagers are very happy, they will procreate like no tomorrow and if left unchecked, your food storage will be ran dry before you know it, resulting in a lot of sudden deaths. One of the Decrees prevents villagers from getting frisky, preventing any babies from being born.
It is ultimately up to you when and if you use Decrees, but properly used they should be nothing but a boon to your progress. Improper use can damper your village’s growth, so think carefully about them.
Roads help with speed!
When you build a new structure, it is usually a good idea to connect it to your main village with the use of roads. Villagers move much faster when they are on a road, and they will always follow them to their destination if you have them down.
You do not ALWAYS need to use roads, say for example you put a Forager’s Hut in the middle of a dense forest with tons of mushrooms and it is kind of in an awkward position, then go ahead and just let the villager travel all the way.
However, if you have structures that are quite far from your home villager, roads are almost necessary. In some instances villagers may not even get to do one thing in a day if their destination is so far away, but roads can really cut down on travel time, making things much more efficient.
Check for villager idle activity!
You may think that assigning four villagers to a job post sounds like a good idea, and generally, you would be right. In the case of things like the Forager’s Huts and Lumberjack’s Base/Cabin, most of time your villagers will be busy, but be on the look out!
If see you a villager just wandering around aimlessly, tap on them and check their status. If it says idle, be sure to find something else for them to do – you do not want any idle villagers just hanging out.
You kind of have to pay attention to really catch these things. Say for example your Foragers pick all of the mushrooms nearby, then they will just sit around until you unassign the villagers or destroy the hut.
But one common example you may find this happening is with the Farms. If you assign four villagers to a farm, they will seed all of the tilled soiled pretty quickly. However, crops still need time to grow on their own, and during this time the farmers will do nothing. You can use this time to send the villagers elsewhere and have them return when it is time to harvest.
Use Priority to order your structures!
If you tap on an unbuilt structure, you can see the status of it and how many resources it has until it is built. There is also an option to flag the structure as priority, and if you do this your villagers will ignore any other unbuilt structure and finish the one you have marked first.
This is useful during the early planning stages of a level. If you put down a bunch of structures all at once, you can somewhat set the order in which your villagers will approach them. Make sure to build in the order of importance, food being the most important.
Always have a big food buffer!
Food is the number one cause of defeat in this game. If you fail to reach the level’s objective before the day limit is up, you will fail the level and must start anew from scratch. If you are behind on food, you are behind on everything else, so it is important to always keep this is mind.
Use your Decrees smartly if you expect a big population boom to happen. Limit your villagers from reproducing, but be careful not to do it for too long as it will drop their happiness and overall productivity.
If you need to hit a certain population by the end of the level like in level 3, use your Decrees to encourage reproduction, but be VERY careful. Make sure you are absolutely ready to take on the huge influx of food intake, as being unprepared can make things go south very fast.

Pay attention to your village alerts!
And the final thing we will leave you with may be the most obvious but it is also the most important: the info ticker at the top right. Every time an important event occurs in the village, like a baby being born or someone losing a job, you will be notified at the top right corner.
Do not ignore these – they present potential problems that should be dealt with as soon as possible. They do not give you exact micromanaging info, but they are still helpful for keeping a close eye on how your village is doing.
And with that, our guide on Outlanders is done for now. If you have any other tips or tricks concerning village growth, please let us know in the comments below!


Published: Nov 28, 2019 10:36 am