
The classic zombie survival first-person shooter that you could play in your browser is finally getting a sequel in the form of the aptly named Zumbi Blocks 2! The game can be enjoyed either solo or with friends in co-op play, but the multiplayer servers require a little more effort to get working. Here is how to play multiplayer in Zumbi Blocks 2.
Playing multiplayer in Zumbi Blocks 2
Zumbi Blocks 2 is officially in development, but everyone can play an early alpha build of the game right now. You can download the open alpha demo for free from the Steam store page for Zumbi Blocks 2.
Playing solo works fine, but the official multiplayer servers are not working correctly at the moment, unfortunately. The developer is hard at work on the servers, but if you are impatient, there is another alternative way to get multiplayer working—through the use of VPNs.
No, we are not talking about VPNs that mask your connection from ISPs like NordVPN or ExpressVPN; we are talking about applications that let you create virtual private networks, such as RadminVPN or Hamachi, or any other VPN applications that you know of.
Related | Zombie Frontier 4 APK MOD v1.5.5 – Download
In this instance, we will be using RadminVPN, as it is the simplest to set up. To get started, everyone who wants to play multiplayer must download RadminVPN and install it, then decide who will be the host.
Note that if you are going to be the host, you may need to open some ports on your router. Zumbi Blocks 2 uses port 25065 by default, but you can also change it. Refer to your router’s manual to learn how to port forward.
Open RadminVPN, and you should see a new window containing your computer name and a generated IP address. If you want to be the host, click on the Create Network button, then give your virtual network a name and password, which has to be at least 6 characters long.
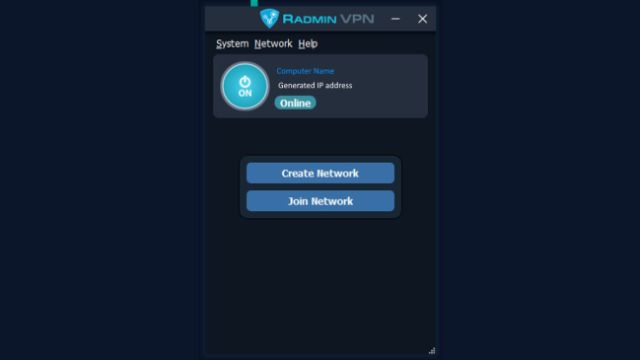
Now, all other players must join your network through RadminVPN. Give the other players your network name and password, and they can join it using the Join Network button.
Once everyone is in the network on RadminVPN, open Zumbi Blocks 2. The host must choose the Start Multiplayer option, as this creates a new server. The other players who are joining select the Connect to game option.
As the host, leave the port number alone or change it if you are using different ports, and add a password if you want. As a joining player, you must input the host’s IP address that is listed in RadminVPN, and use the same port as them.
If everything was set up correctly, you should see players appearing in the lobby. Check for any input errors if you cannot join. If nothing is working, you can always just wait for the official implementation of multiplayer.


Published: Apr 18, 2023 04:25 am