
This article is sponsored by The House of Da Vinci 3
The House of Da Vinci 3 is a tricky environmental puzzler, with a wide array of brainteasers designed to tax the minds of even the most experienced puzzle game aficionados.
There’s a knack to it, though, and once you’ve got your head around the different types of puzzle on offer you should be able to reach the end without pulling out too much of your hair – as long as you’re patient and methodical.
To help you on your way, we’re going to walk you through Chapter 2: Villa of Luca Pacioli.
Why Chapter 2? Because Chapter 1 is a fairly soft landing and we think you’ll be just fine getting through that one on your own.
Chapter 2, on the other hand, is where The House of Da Vinci 3 really starts to bare its teeth. We don’t want to fill your head with spoilers for the remaining seven chapters, so we figured a helping hand through the game’s first big challenges would be just the ticket.
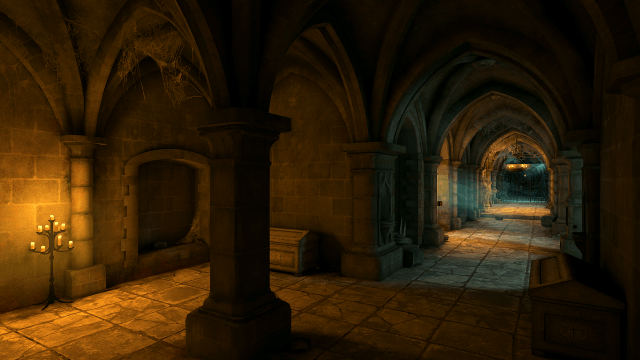
How to Make It Past the Villa of Luca Pacioli
Approach the door and zoom-in on the knocker on the left. Twist it to remove the panel, and then use your Oculus Perpetua to expose a revolving maze puzzle. Simply rotate the maze to guide the button to the exit. You’ll have to do this three times.

After the door opens, head through it to find a stove with a dragon-headed chimney. Remove the stove cover by sliding the catches on either side. Use your Oculus Perpetua to expose a selection of symbols, and pick the rectangular one.
Slide the handle across to rotate the chimney, and swivel the handle on the bellows to make the dragon breathe fire onto the post.
Once you’ve climbed the stairs, head to the door on the right, use the handle, and then push. Slide the book from your inventory onto the scale to expose a letter and a strangely shaped crank.
Go back out into the courtyard and use the crank with the mechanism to your left. Solve the sliding puzzle to release the wagon. Collect the ironbound disc and then head into the room.
Head to the desk on your right and turn the inkwell until the feather is over the III. Take the cart model and place it on the wheel behind you. Turn the wheel to align the track with the track on the table.
Remove the ornamental lever part from the plinth under the wheel. Combine with lever part with the ironbound disc in your inventory to create an ornamental lever. Use it in the mechanism on the stone stair post.
Zoom-in on the circular mechanism on the stair post, slide the pieces together, and turn. Twist the part that emerges to expose a cross-shaped key. Use this in the cross-shaped keyhole on the desk.

Open your Oculus Perpetua and spin the large wooden cogs to create a blue shape. Twist the eight dials on the outside of the page so that they each point in the direction of the nearest blue line. Take the belfry model from the drawer.
Go over to the model behind the model railway table and slot the belfry into the gap. Remove the bell model, and then pick up the wooden plate with protrusions.
Open your inventory and twist the bell to reveal a small key. Use this on the model cart. Zoom in on the green-patterned junction and spin it around.
Turn the compass so that the mechanism lines up with the mechanism on the right-hand drawer. Slide the mechanism across to open the drawer. Pick up the wooden frame, then slide the brass panels together to reveal a hidden compartment containing a compass. Turn it 180 degrees.
Slide the mechanism across to open the left-hand drawer. Use the wooden frame with the open drawer to expose a handle. Turn the handle to load the frame with bolts. Leave the room.
In the courtyard, head towards the pile of jugs, and then zoom-in on the barred enclosure to the right. Use the wooden plate to unlock the enclosure, and then slide the bars around to create an opening. Take the lion statue.
Head back to the courtyard entrance and zoom-in on the black square with the slot. Use the lion statue here, sliding it along the slot and then twisting it to create a staircase. Head up the stairs and pull the lever. Take the mechanical handle.
Head to the tower and climb the stairs. Slide down the lock on the wooden cog mechanism, and then turn the handle to open the circular gate downstairs.
Head back down the stairs and use the Oculus Perpetua and create a portal. This cuts off your access to the ground, but gives you access to the windmill.
In the frozen past, use the frame and the mechanical handle with the mounted crossbow. Find and destroy the jugs. Shoot the rope holding up the bell in the belltower. Shoot the rope on the grate beneath the tower.
Turn the handle to your left to move the bridge. Shoot the target on the windmill three times. Turn the handle again to return the bridge to its original position. Pick up the ring with the ornamental handle. Manipulate it in your inventory to create a tool.
Head up to the windmill and use the tool to open the door. Turn the wooden barrel to your left to expose a wooden folder.
Return to the mounted crossbow and use your Oculus Perpetua to return to the present day. Return to the courtyard and enter the room. Approach the desk and move the paper to create a blank page.
Open the wooden folder in your inventory to reveal a windmill sketch. Place this on the desk. Now use your Oculus Perpetua to expose a windmill model. Turn the handles to line up the blue lines. Collect the archimedes screw model.
Zoom out and place the screw model on the cart model. Open the drawer and take out the windmill model part. Insert it into the windmill model and turn the blades. Take the round key.
Head up the stairs to your left and use the round key in the lock. Take the metal crank. Head outside and go to the grate under the belltower. Pick up the clapper and then return to the cart. Use the clapper star-shaped cog and twist. Turn the handle to set the cart in motion.
Use the crank in the lock and then use the handles to complete the sliding block puzzle. The aim is to create an unbroken black line from the entrance to the exit (you can work this one out for yourself).
Return to the courtyard entrance and climb the stairs. Climb to the tower and turn the handle to open the circular gate. Head back down to the courtyard, go to the gate, and take the ringed screw.
Find the large mechanism beside the windmill and twist the ringed screw into the hole at the base of the wooden bollard. Take the cogwheel.
Return to the room and use the cogwheel in the mechanism beside the desk. Turn the handle until the hand plane comes into view, and then the handle in the metal frame, and finally the cutter. Pick them all up.
In your inventory, open out the handle in the metal frame to create a metal crank part.
Head to the staircase at the back of the room and use the cutter on the chain. Go through the door and pull the lever on your left. Go to the back of the large pipe and turn the handle. Pick up the tool.
Return to the courtyard, go to the cart, and use the tool to remove the wooden bar at the base of the cart.
Return to the mechanism at the base of the windmill and use the metal crank part on the large wooden structure resting in what looks like a well. Turn it.
Examine the maze on the wooden bollard. Use the controls on the right, guide the moving part through the maze to all four corners. Take the flower-shaped ornament from inside the door.
In your inventory, place the wooden flower in the hand plane. Return to the room and use the hand plane handle with the mechanism on the stair post. Take the ornamental lever part.
Head back outside to the mechanism at the foot of the windmill and use the lever part on the bollard. Turn the handle on the large wooden mechanism in the well, and then use the handle (the only remaining item in your inventory) on the wooden bar at the base of the cart.
Pick up the massive weight, head upstairs, and activate your Oculus Perpetua to create a portal. Cross the bridge to the windmill, head inside, and use the massive weight in the black metal cage to create a path to the top.
Push the handle to repair the windmill. Step into the paternoster and return to the courtyard. Climb the stairs to the first floor and pull the lever to create a walkway to the roof.
Head over the walkway to the weathervane and twist the sun handle on the left. Turn the central handle. Pick up the letter and the bronze chalice.
Pull the handle again to restore the original walkway. Head downstairs, enter the room, and place the chalice on the scale in order to retrieve your chronicle.
And that’s it. Congratulations! You’ve solved Leonardo’s puzzle and you’re off to Rome. Try out The House of Da Vinci 3 now on the App Store.


Published: Aug 16, 2022 12:34 am