
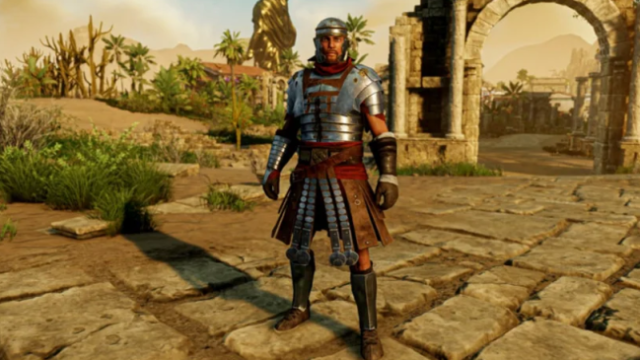
For players of level 55 and above, the Dynasty Shipyard Expedition is a group dungeon that requires five players. It is also the most difficult player vs. environment (PvE) encounter you will have had in New World up to this point. In this stage of the game, you will have your first encounter with Isabella, the main antagonist of the game, as well as her two vicious dogs, in a boss fight that is very challenging. On this page we present you with a complete ‘Guide for Dynasty Shipyard Expedition in New World’! Read below!
About Dynasty Shipyard Expedition
Before you go into the dungeon, there are a few things you’ll want to bear in mind:
- The whole dungeon is infested with corrupted monsters. This renders them vulnerable to the following types of damage: 30% more damage from arcane sources, 20% more damage from thrust sources (including weapons such as the spear, musket, bow, rapier, and blunderbuss), and 15% more damage from natural sources, including the life staff.
- The Warhammer and the Ice Gauntlet both suffer a damage reduction as a result of this boost. Because the Gauntlet suffers a 40% damage reduction, it is clear that this is not the optimal weapon option.
- You may add additional damage to your attacks by putting a Nature or Arcane gem into your weapon. The Sapphire gem is used for arcane, while the Amber gem is used for nature.
You are able to choose the Expedition and find a group to participate in it with by using the Group Finder. In this dungeon, like in the others, the recommended party composition is one Healer, one Tank, and three Damage Dealing Specialists.
Entrance
The Dynasty Shipyard is an adventure that is somewhat difficult. In addition to the two large monsters that you have to defeat, the dungeon is populated with a number of minor bosses and named Elites that you must also slay.
Eastern Pier.
The dungeon essentially begins here, at this same location. You will face a few mobs that have no purpose other than to make you prepared for what is ahead in the dungeon. There is little of importance in this area, with the exception of a Dragonglory plant that is just across from where you spawn.
First Wave
Here you’ll confront Summoner Yau. He will pretty much always be spawning ads, and he has a strong assault that will affect a large area that you need to look out for. Attack Yau while his ads are being whittled down by your aggro, and then do damage to Yau before he can create more. If your team has a damage dealer with some skill, you should be OK.
Use your Azoth Staff to bring the Monolith crashing down. After you have traversed the Respawn Shrine and obtained the stockpile located to the left, you will need to position several kegs.
Northern Shore
Moving on to the next region, you will find that this one has not one but two minibosses: Spearman Chiu and Maiden Jingfie.
- The fight against Chiu is rather simple, since it is simply just a larger version of the standard Spearman enemy that you have previously encountered in the trip. Dodge, block, attack. There is nothing difficult about this.
- The Maiden Jingfie presents a few extra challenges. She is a dress rehearsal for what will take place in the Shipyard. This miniboss is a spellcaster that will cast a number of spheres that will shoot at you while also delivering area-of-effect damage around her. Lastly, be wary of her dragon since she may call it forth from her sphere, and it causes a significant amount of damage.
Marble Courtyard
At this point, the Shipyard will simultaneously challenge you with three smaller monsters. Commander Chen, Maiden Daiyu, and Maiden Lanfen.
Chen is a massive man who wields an even more massive sword. After you have eliminated the two Maidens, who are precisely the same as Jingfie (the miniboss that you have just slain), you will need to focus your tanking abilities on him. Chen has a ton of health points. It is a smart strategy to have your tank draw aggro while your damage dealers backstab the enemy.
Chen lands powerful blows. Dodge and block work beautifully here.
Chen also possesses an area-of-effect move called a ground stomp, in addition to a swing with his great sword. Both have the ability to one-hit-kill squishy damage dealers. It is best to stay away from them.
After securing the treasure chests in the Marble Courtyard, which are located on the page to the right of the entrance, go to the Western Piers.
Western Piers
The next zone has a fairly simple objective: position kegs, watch for them to explode, and protect yourself from waves of monsters. The lone miniboss in this area is Lieutenant Bolin, and he is a pretty basic adversary, being nothing more than a more powerful version of the standard Shipyard Warriors (the guys with shields.) Have your tank take the initiative and move your DPS behind him to do damage. The obvious thing.
One of the chests may be found submerged in the sea, while the other can be found on the path leading up to the boss arena for Isabella.
Imperial Wharf
You will now engage in the first boss encounter of the adventure, which is also the first real test you will face. The battle against Isabella is easy enough, with some rather predictable assaults, but things become harder when her two dogs, Oro and Jovo, are set wild on the battlefield.
- Isabella is equipped with a pistol that she may pull out for occasional ranged damage in addition to a rapier that does a decent amount of damage. Both are straightforward to anticipate and navigate around. She teleports about a little here and there and will spawn several Musketeers and other adds, both around her and on the ship just outside the arena in the distance. The battle shouldn’t be too tough if you focus on killing the adds and inflict damage whenever you can.
- It would be wise to have a player with ranged weapons eliminate the Muskets located aboard the ship and around the arena’s perimeter. These may add up to produce some very terrible harm over time.
- Oro and Jovo are Isabella’s pets. They are basically large tiger mobs with some bears that can move very quickly and strike quickly. They are, to put it mildly, a pain in the neck. If it is feasible for your tank to aggro both of them, you should attempt to do so. If you don’t, one of them will be held down while the other hunts down your squishy damage dealers and healers. A significant amount of DD is required here. The faster you can put an end to one, the better.
- It is advisable to concentrate on one of the pets initially while another player takes care of kiting the other. This is a difficult phase of the battle, and you may have to start over a few times until you figure out how to maintain your equilibrium.
Barracks
Not much to write home about in this regard. There are just two more minibosses left, and they are quite similar to the ones you’ve already faced. Unless you clear down all of the structures in this area, the mayhem caused by the mobs will likely bring an early end to your run. Both Guang and Kaiwei are called Warrior mobs. Guang is a summoner, much as you’ve seen before, and Kaiwei is another. The obvious thing. Obtain the Dragonglory from this location, as well as the Orichalcum veins and the supplies stockpile that can be found to the right.
Imperial Palace
The Empress Zhou battle is the primary boss encounter in the Dynasty Shipyard. Zhou is essentially analogous to a much more challenging and dangerous version of the Maiden mob that you have previously faced many times in the Expedition. She does significant area-of-effect damage, produces more enemies and totems, and launches forth dragons that may cause significant damage throughout the whole arena.
A large purple light protects you from any of her assaults that you could launch. Prepare yourself to sidestep.
You may avoid the area-of-effect assault caused by the shockwaves if you timing it correctly. Both ranged damage dealers and healers should pay attention to this detail.
Destroying the beacons or totems, depending on how you choose to refer to them, will give you a higher chance of winning the battle against Zhou. If they are merely left alone, the whole arena has the potential to become coated with dragon damage, which will cause your entire squad to perish since there is nowhere to hide.
The foundations of the battle are straightforward: the tank should focus aggression on Zhou, they should eliminate the adds, and they should destroy the beacons whenever they appear. Additionally, dodging is a pretty vital skill to have here.


Published: Nov 23, 2022 03:34 pm