Creaks is a dark fantasy puzzle adventure that casts players into the role of an everyday normal person. Something rather peculiar is going on below your house. Armed with nothing but your own wit, you descend into the core of your house only to find a gargantuan castle filled with dangerous creatures! With dastardly contraptions and tricky puzzles to solve, you will need to be on your toes to survive this adventure.
In Touch Tap Play’s Creaks walkthrough, we will go over roughly the first third of the game, covering scenes 1 – 20. Each scene contains a main room full of mind-bending puzzles, but we have the solutions here. Let’s get started with our Creaks walkthrough for scenes 1-20!
Prologue
After a faulty light starts flickering off and on, a mysterious door will appear on the wall. This intro serves as a tutorial on the basic controls of Creaks – you can move left and right, climb ladders up and down, and interact with objects using the action button at the bottom right.
There may also be times where you will need to use a different kind of action; in these instances, a smaller button will appear above your main action button.
Interact with the door that appears on the wall, and your journey will begin as you descend the ladder…
(This Creaks guide was first published on Touch Tap Play)
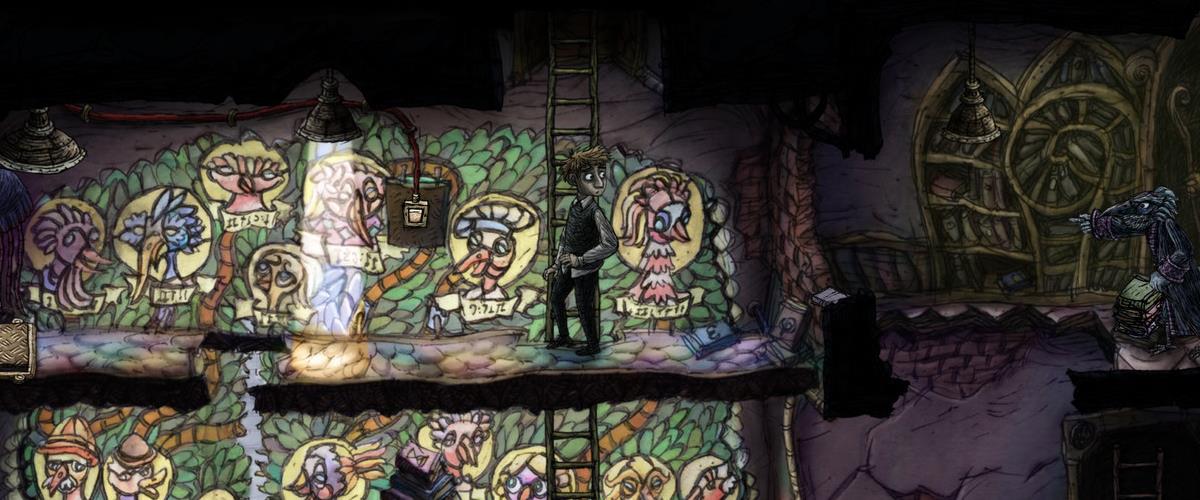
Scene 1 / Tutorial
As you descend the ladder, the camera will zoom out to show the massive castle that has appeared next. Keep climbing down, and you will get more control prompts on how to get off ladders, drop down from ledges, and jump across gaps.
This level is fairly short as it is designed to teach you the basic controls, so just keep following the path until you descend down a ladder that transitions into the next scene.
Scene 2
Here we are introduced to your first threat: a robot dog! These guys will be alerted to your presence when you walk around the same floor as them. When you get close enough, they will hop into the air and start chasing you.
Notice the little crack in the floor at the bottom left corner of the room? You will need to get the dog’s attention and have it chase you, then jump across the gap. That way you can climb up, take the second story route, and climb back down to the exit.
Scene 3
Another dog here. Climb down the middle ladder but not all the way to the bottom – get off in front of the dog. Have it chase you and run to the left, dropping down when you get to the hole. Climb back up the middle ladder and run to the right before the dog comes back.
Climb up the ladder on the right, then you will be able to reach the crank that lifts the barrier. Drop down, then cross the gap to continue forward.
As you are making your way forward, a board in the wall will drop revealing a little peep hole. If you look through it, you will see a light bulb on with a dog refusing to cross under it. A little bit of foreshadowing, perhaps…
Anyways, you will eventually climb up into a room with two barriers that can be manipulated. Climb the ladder on the right and use the crank to drop the right barrier and lift the left one. Climb down the middle ladder and lure the dog over to the middle.
Use the crank again to lift the right barrier, then lure the dog over all the way to the right. Use the crank to trap the dog in the back and move forward.
Scene 4
Just as we thought, the dogs cannot enter areas with strong light. Drop down the ladder all the way to the bottom floor and push the dresser to make a stepping platform. Climb up the ladder, and after a short cutscene you will be chased by the dog again.
Drop down the hole. There are two dogs on the bottom level, and you will need to corral them near the right side of the room, as you need to cross over the gap at the left side. Use the ladders to do this while keeping yourself safe.
Climb up the ladder, then go straight right to use the crank. This will drop the bridge down, but it will also attract the dog from earlier. Lure it all the way to the left, then climb up the ladder. Hit the light switch and if the dog gets caught in the light, it will turn into a dresser!
Push the dress under the ladder that does not quite reach the floor. Climb up it and then descend down into the next scene.
Scene 5
You will be presented a peculiar painting. Drop down, then turn on the light switch to turn the dog into a dresser. Climb over it and hit the next switch, creating an overlapping light. You will need to turn off the first switch, then turn on the third switch, then turn off the second switch.
If you do this right, you will be on the right side the dog closer to the right. It will turn back to normal when it out of the light, but the other light switch you flipped will turn it back into a dresser. Once you get the dog under the right most light, you can use the dresser to reach the ladder.
Scene 6
After the cutscene, hit the switch to transform the right dog. When you get to the next dog, climb up the ladder and pull the dresser onto the switch to keep the light on.
Next up is a room with two dogs. First, lure the bottom dog to the left to keep him under the light. Then lure the top dog to the left as well so that he stops on light switch. With the bottom dog transformed, you can cross to the right safely.
Now, you have to do it the other way around. Lure the top dog to the right to bring him near the lamp. Lure the bottom dog to the right so that it stops on the light switch, then climb up and climb on the top dog dresser.
Scene 7
This one is a tricky room. First head up to the room with the crank and use it, which will free the dog on the right. Wait until the dog goes back to the right, then climb down the ladder and attract both the left and right dog.
Quickly descend down the ladder, and if you are fast enough both dogs will stop on the floor switches next to the middle ladder, creating a safe passage through the bottom room.
In the next room, there are two dogs. Lure the top down all the way to the left, then drop down the hole. Climb back up the ladder to lure the dog back to the middle, and it will stop on the light switch. This will transform the bottom dog, so use it to climb up.
Scene 8
There is another painting mini game here. It is a runner type of game, and you need to pull the lever on the left side to make the man jump over obstacles.
Moving on, you will come across a three-story room. Use the crank to drop the bridge, then drop down the hole to the bottom floor. Activate the light switch to transform the dog on the left.
There is a second light switch that will activate the lamp in the middle of the room. Lure the dog under it and keep the dresser there. Use the crank again to drop the bridge, blocking the light. The dog will then return to the left and stand on the switch, transforming the top dog and opening the way forward.
Scene 9
Use the crank on the top level to drop the bridge on the middle level. While the dog is still distracted on the left side, quickly drop down the ladder and cross the bridge.
Drop down, then climb up to the top level. Use the left lever to drop the barrier. Use the crank again to put the bridge back up, then bring up the barrier. Go around the dog, then lure it into the light and push it under the ladder.
Drop the barrier and bridge again, then raise the barrier. Lure the first dog all the way to the right, also transforming it. With both dressers, you can have one on the light switch and one below the ladder. There is another painting you can examine before moving on.
Scene 10
A new enemy is introduced here: the shadow jellyfish. These guys are pretty chill and are not alerted by your presence, you simply have to work around them as they just move back and forth on a fixed route.
Make you way to the bottom, then go back up the right ladder to pull the lever to open the bottom left door.
Scene 11
One thing to note about the jellyfish is that they can hover over gaps. With that in mind, pull the lever so that the middle barrier is lifted. When it is safe, cross over and pull the other lever to raise the right barrier. Make your way over to the bottom right exit.
Scene 12
Go to the right side floor switch and wait in the light. The jellyfish cannot cross through you, so it will go above. Climb up and pull the lever to reveal the way forward and examine the painting if you wish.
On your way back use the left side light switch to keep yourself safe.
Scene 13
After the cutscene, you will be in a three-story room. Step on the switch at the bottom to let the jellyfish out. It will go to the right, then go above, resulting in an interesting interaction – the jellyfish will push the dog to the left.
Hit the middle switch when the dog is all the way left to transform it. Use the lever at the top right of the room to drop the bridge down, then let the jellyfish through again using the switch on the bottom floor.
With the bridge down, the jellyfish will go down instead of up. It will push the dog all the way to the left, so quickly drop down the ladder the dog was guarding.
Scene 14
You are in a large, four story room. Go down to the second floor and step on the light switch to force the jellyfish to go up. Once it reaches the top, it will move left and push the dog onto a light switch.
Before you head back to the second floor, jump over the middle gap and use the light switch on the right to turn off the lamp, then go back down. Force the jellyfish to go up again and this time stand on the floor switch to force the jellyfish to the right to transform the top right dog.
Turn the lamp back on on the fourth floor before you go down, then force the jellyfish up. Step on the floor switch again, and this time the jellyfish will go straight down and to the right, transforming the last dog of the room.
Scene 15
There is another interactive painting here. Climb down the ladder and pull the lever to raise the left barrier. Cross over and pull the lever to raise the right barrier. Drop the left barrier and wait for the jellyfish to reach it and turn around.
As it is going back, raise the barrier. Cross over and drop the right barrier. Follow the jellyfish closely, as it will turn around and go backwards. When it gets into the left room, drop the left barrier. The jellyfish will eventually make its way to the bottom floor, pushing the dog out of the way.
Scene 16
Another four-story room to deal with. Use the light switch on the first floor to turn off the light. Wait for the jellyfish to move, then cross over to the left side and use the light switch to turn off the left light.
The jellyfish will end up on the first floor, so turn on the light switch. It will be forced to go up and to the left along the second floor. As it passes the light switch, flick it on. The jellyfish will make its way down, then to the right. Before it gets to the right, flick the first floor switch off.
Once it gets past the first floor lamp, it will turn around and go backwards, so turn the light back on. With both the first and second floor lights on, the jellyfish will go all the way up to the fourth floor and position itself right underneath the lamp, so turn it on to transform it and push it onto the floor switch.
Scene 17
Pull the lever in the middle to use a new kind of contraption. This lamp works like a regular one, but you can move it left and right. For now, leave it covered by the umbrella. Free the jellyfish by stepping on the floor switch.
Drop down to avoid the jellyfish and let it go all the way to the left side of the room. Quickly climb the ladder and use the lever to move the lamp all the way to the left to transform it to use it as a weight on the floor switch.
Scene 18
Use the lever to move the lamp all the way to the right where it is blocked from reaching the bottom floor. Lure the bottom dog to the ladder, then use the lamp to push the dog left but NOT onto the switch.
Move to the right and lure the top right dog into the middle of the room. As the top dog is returning back to its original position, quickly run back to the lever and THEN force the bottom dog onto the floor switch to catch the top dog under it and transform it.
Another painting awaits you.
Scene 19
A three-story room. Use the lever on the bottom floor to push the top dog to the left onto the floor switch. Lure the middle floor dog all the way to the left on top of the switch, then drop down and go around the dog. There is a ladder the dog was guarding, which houses a small room with a painting.
After you are done examining it, move to the left – a hidden floor switch will lift the barrier, allowing you entry back into the main room. Push the top dog onto the left switch using the bottom floor lever to free the dog on the middle floor, but move the lamp back to the right so that the dog has some room to move off of the floor switch.
This will prevent the middle dog from going back into its neutral spot on the right side. Lure the middle dog onto the left floor switch, then use the bottom lever to move the lamp to left, forcing the dog under the lamp.
Another painting awaits you, but it is an interactive one this time. This time you need to defeat a knight in a duel. The right lever attacks, while the left lever changes your shield position. Watch the enemy’s stance – if his sword is high, block high, and so forth.
Scene 20
Another three-story room. Press the switch immediately in front of you to turn off a lamp above the floor switch at the top left corner of the room. Climb down the ladder and turn off the lamp to let the jellyfish pass.
Turn it back on, and the jellyfish will go up. As it is above you, move to the left and lure the dog to the right so that it is next to the light. When the jellyfish comes back down and reaches the dog, it will make its way to the top floor. When it is above the floor switch, hit the top floor switch to transform the jellyfish.
This will also turn the dog on the middle floor into a dresser, allowing you to reach the birdman.
That’s all for our first guide on Creaks! Stay tuned for a continuation of this walkthrough!


Published: Jul 23, 2020 07:16 am